Category Archives: Real Estate Know-Hows

Solar Power: 9 Crucial Steps To Prepare Your Home

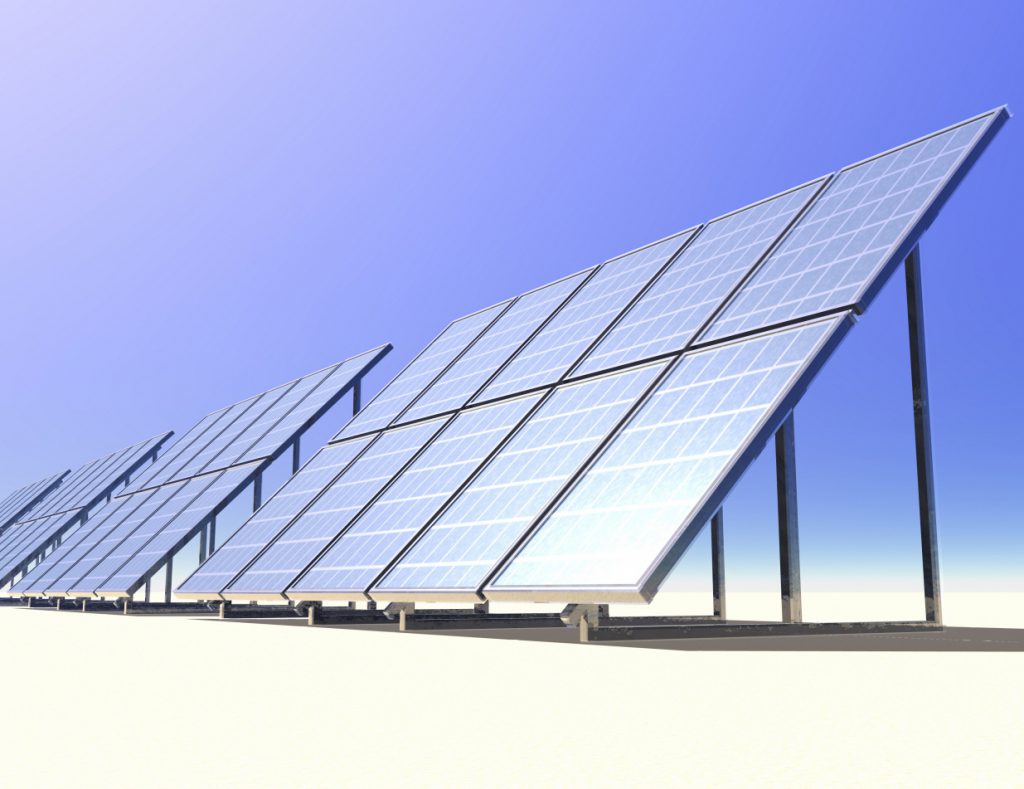
Solar power is a booming industry in the United States.  Photovoltaic (PV) solar panels are still expensive, trends in production efficiency and cost of materials point to a continued drop in the price of PV units that could make the technology accessible to middle-class incomes within a decade.

9 Crucial Steps to Prepare For Solar Power

Whether you’re chomping at the bit to add some solar units to your roof or simply investigating the scope of the process, there’s plenty to be done in preparation for the shift to solar.  Here are 9 crucial steps to prepare for solar power at your home.

Step 1: Consider Your Options

solar

Solar energy is rising in popularity as prices continue to drop, leading to greater competition among solar contractors, installers, and manufacturers alike. Because of this, there have never been more opportunities available to consumers when it comes to solar energy.

The list of solar panel manufacturers continues to grow as parts and materials become cheaper, but speaking with a solar energy contractor about the specific goals for your solar energy plan can help determine the scope and costs of your project going forward.

Because you’ll need help from building inspectors and the power company in your community, it is advised that you consult with your local resources and find a solar installer that has experience in permitting and project management to ensure the process goes smoothly. Homeowners looking to implement solar power should order a cost/benefit analysis survey from a certified solar installer. This survey will identify roof slope, property orientation, shading, optimal placement sites, power distribution and storage (if applicable), and finally, aesthetic considerations.

Step 2: Find Rebates and Incentives

Depending on your geographic location, your local public works department or utility company may offer impressive rebates on the purchase costs or installation of solar panels on your property. A full list is available here, complete with breakdowns of individual solar energy rebate programs by state.

In some instances, such as in Texas, some utility companies will pay as much as 45% of the initial cost of installation – a huge motivating factor for homeowners, especially taking into account the additional 30% write-off at the end of tax season.

Step 3: Secure Financing

Under the Consolidated Appropriations Act of December 2015, the federal government will provide a 30% tax credit to homeowners for qualified expenditures toward a PV system. In order to secure the full credit, systems must be placed into service by 12/31/2019. The same rebates are available to businesses operating within the United States.

The U.S. Department of Energy, the U.S. Small Business Administration, and various other federal agencies offer loan programs for both homeowners and businesses seeking to invest in solar power. Compared to a conventional mortgage or residential energy efficiency improvement loan from Fannie Mae or Freddie Mac, securing a loan for energy improvements through the SBA can more than double the maximum loan amount available – up to $750,000.

As far as the costs of the panels themselves, the average cost per watt generated reached less than $0.74 in 2013, but in areas such as Massachusetts, Louisiana, and California, the payback period (or the return on investment) is fewer than 10 years.

Step 4: Make the Necessary Repairs and Upgrades

4880625_27c0ca27

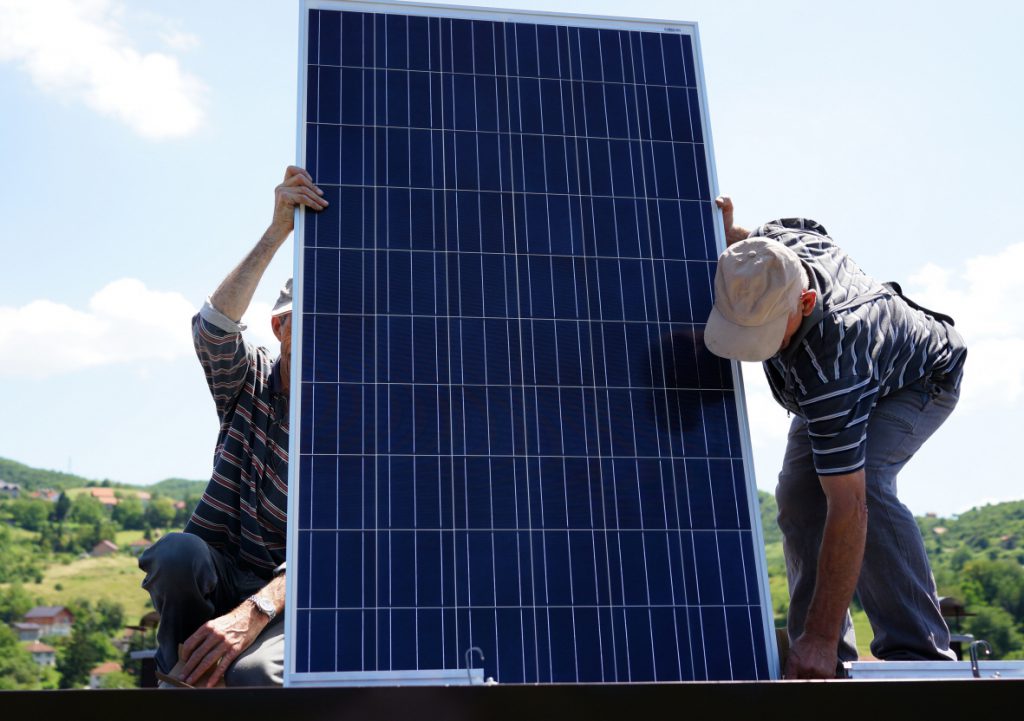
In order to prepare your property for solar panel installation, you’ll need to consult with a building inspector to ensure your roof is structurally sound and capable of housing heavy solar arrays.

Due to the weight and surface area utilized when installing solar arrays on a residential rooftop, it’s important to first check the condition of your roofing materials before committing to a solar solution. Because any repairs made to the roof after installation will require complete removal of the solar panels, it’s wise to order roofing repairs or replacement in advance of adopting solar energy systems into your home’s energy profile. While these upgrades may not be as invasive as an indoor home remodel project, the scope and technical nature of the project may require additional prep work before contractors can get started.

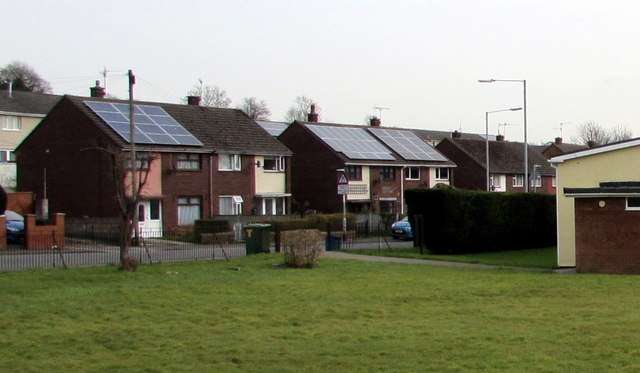
Most PV panels are mounted on south-facing roofs, but roofs with east-west orientations or flat-roofs are acceptable, as installers can position the arrays at optimal angles to maximize exposure to sunlight.

In preparation for installation, consider building a separate utility nook or storage cabinet to house a battery, electrical inverters, and Balance of System (BOS) equipment to integrate the solar modules for use with the home’s existing electrical system. Because solar energy is becoming increasingly affordable, more and more companies are expected to enter the market, bringing new and exciting products and solutions for energy-conscious homeowners. The frontrunner in this department is Tesla’s Powerwall, which will provide 6.4 kWh of home energy storage capacity when consumer models ship in 2017. Designed for use with solar panels, the Powerwall allows homeowners to actively capture solar energy for later use or sell the excess energy back to the grid.

Step 5: Permitting and Rebate Process

Most city utility companies require the following documentation before installation can begin:

  • Level 1 Interconnection Application and Agreement for inverter-based generating systems
  • Electrical diagram of proposed generating system
  • Specifications of inverter
  • Application for electrical service (required for use with meters and various state/local production incentive programs)

A qualified solar installer or contractor should have these documents prepared or available to you upon request.

Furthermore, the solar contractor must obtain an electrical permit prior to installation. Your local building or planning department will require an electrical inspection before replacing your old meter with a reverse-power meter.

After installing and implementing a solar energy solution in your home, you should be eligible to receive as much as a 30% credit on your federal income tax bill. Through December 2016, homeowners who invest in an energy efficiency solution will be able to complete IRS Form 5695 – Residential Energy Credits. According to the instructions for the form, qualified applications of the tax credit are for costs related to the following:

“Qualified solar electric property costs are costs for property that uses solar energy to generate electricity for use in your home located in the United States. No costs relating to a solar panel or other property installed as a roof (or portion thereof) will fail to qualify solely because the property constitutes a structural component of the structure on which it is installed. The home does not have to be your main home.”

Your state and local governments, utility companies, and energy efficiency coalitions may offer additional grants, credits, and rebates toward the adoption of solar power in your home. For a complete list of the possible benefits, check the Database of State Incentives for Renewables and Efficiency.

Step 6: Investigate Buyback/Energy Storage Solutions

If you plan to help offset the cost of your solar energy system by selling excess generated power back to the grid, you’ll need a production meter installed and configured by your local electric company.

A production meter measures the amount of electricity generated by an energy source, operating essentially opposite of your standard utility metering system. Production meters connect to your system via the AC disconnect on your solar inverter before passing through the main interconnection breaker on your property.

Utility companies commonly read production meters at the same rate by which they monitor standard meters, sending the homeowner an annual report with information pertaining to the kilowatt-hours produced by your solar energy system. Using that data, you’ll need to complete a yearly application for compensation for excess energy your system provided for the grid. Incentives arrive either in the form of service credits or check by mail.

Among the first consumer-grade electrical storage system was Tesla Motor’s Powerwall, which actively captures and stores solar-generated energy for backup use or daily electrical needs. While other companies are following suit and producing low-cost, high-capacity batteries for solar-powered buildings, Tesla is considered the leader in the still gestating industry. The company estimates each unit will perform at 92% round-trip DC efficiency and initial models will store 7 kWh (about 1/3 the average daily energy used per American household as of 2014). Because residential electrical systems operate on AC power, a converter will be necessary in order to utilize the energy stored by the Powerwall.

Step 7: Finalize Power Efficiency Solutions

As with most energy-efficiency upgrades, adding solar power to your home will only work to maximum efficiency if other aspects of your home are working in concert with your new system.

Some low-impact, DIY projects to put on your list:

  • Check each door and window for broken or cracked seals.
  • Add a layer of protective window film to further improve energy efficiency indoors.
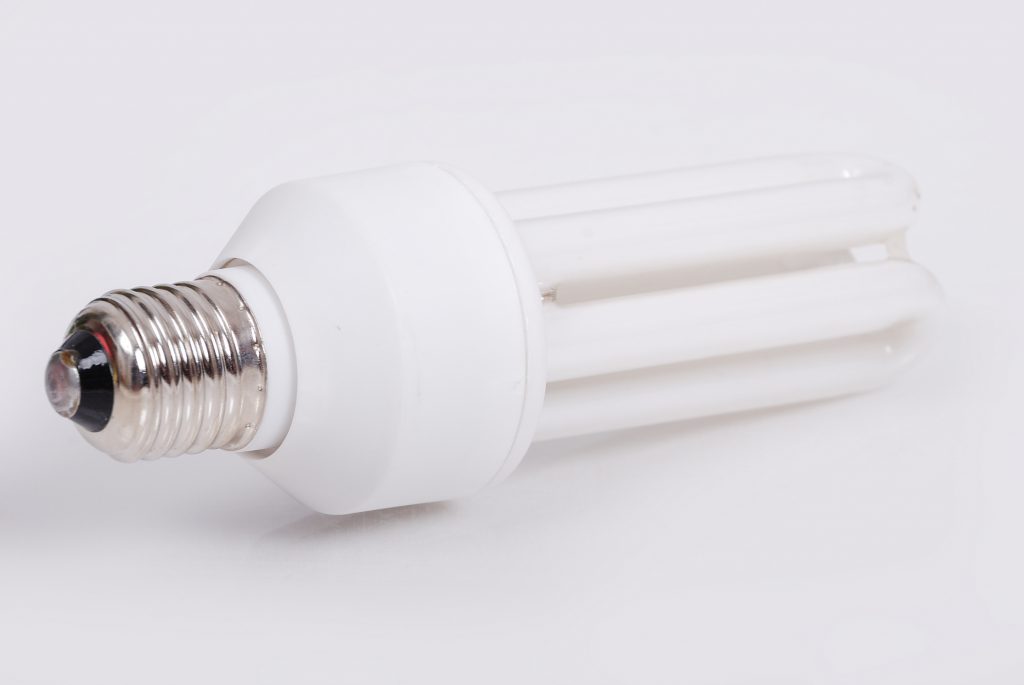
  • Replace your old bulbs with high-efficiency CFL or LEDs.
  • Install energy-saving smart thermostats.
  • Order a rain barrel to collect excess rainwater for later use.
  • Replace air filters in air conditioning and heating systems, vents, and appliances.
  • Invest in energy-smart power strips and timers for electronics.
  • Add additional insulation to problem or leaky rooms.
  • Check your roof and attic for leaks or install ventilation systems to prevent capturing hot air.

Once again, a home energy audit from an energy-efficiency professional will be the best way to analyze and assess the strengths and weaknesses in your home’s energy efficiency standards.

Step 8: Installation and Implementation

Man installing alternative energy photovoltaic solar panels on r

Before installation, your solar energy contractor will assess the following:

  • Viability of available solar resources.
  • Size of system necessary to meet your home’s average electrical requirements.
  • Ideal placement of control system and electrical infrastructure
  • Potential for connection to grid or potential for off-the-grid use.
  • Safety and reliability standards.

While it’s not unheard of homeowners installing solar electric systems on their own, it’s highly recommended (and sometimes, depending on your location and system of choice, required) that you hire a professional solar installer to oversee the entire project.

When choosing a contractor for your solar power system, consider the following:

  • Request separate bids for roof-mounted systems and ground-installed PV solutions.
  • Inquire as to the level of experience of the contractor in question. How many solar energy systems have they installed? How often?
  • Ask for proof of certification or licensing. Your state’s licensing board should have information regarding each licensed contractor in the industry.
  • Check for disciplinary actions or pending complaints against the contractor. The Better Business Bureau and your city government should have information regarding any pending liens or judgments against a company.
  • Ask for energy/cost estimates based on the solar resource of each prospective installation site, size/scale of the system, type of PV panels intended for use, and the current conditions of your home’s existing energy efficiency solutions.

Unless your solar electric solution is part of a new, energy-efficient home construction project, chances are you’ll also need a licensed electrician to install and verify a few secondary but critical aspects of your new energy system. Both stand-alone and grid-connected solar energy systems require power conditioning equipment that must be implemented within your home alongside your new PV panels and batteries. For reasons that should be clear, it’s never a good idea to leave electrical work to a handyman or a DIY project. The current requirements for grid-interactive power inverters, known as UL 1741, should serve as a reference point for solar contractors moving forward.

Safety Considerations

Every electrical system is at risk of failure, damage, and deadly surges that must be addressed on a system-by-system basis. According to the National Fire Protection Association and its updated National Electrical Code, renewable solar energy systems should implement the following to ensure safe and continued operation:

  • Safety disconnects to protect internal system wiring, allow for safe repairs, and ensure isolation from the grid.
  • Grounding equipment that provides a safe, low-resistance path for errand surges, lightning strikes, and equipment malfunctions to discharge into the ground.
  • Surge protection equipment to protect electrical gear against lightning strikes and electrical storms.

Step 9: Testing and Analysis

There are several ways to evaluate the efficacy and reliability of your system. First, built-in meters and instruments on your solar control or energy monitoring panels should provide enough information about energy usage, current storage levels, rate of energy generation, and amount of converted energy to date.

Some solar energy systems provide connectivity to third-party smartphone monitoring apps and provide better visual representations of data collected within your home over longer periods of time. Other gadgets such as Nest work seamlessly with modern energy systems, helping to better use and conserve energy, reducing the amount of maintenance required by the homeowner in order to reach maximum efficiency.

Finally, in order to fully understand and appreciate the effectiveness of your solar energy system, you’ll want to keep your old utility bills from the previous year and measure year-to-year comparisons once you’ve had your system operational for a full year. Ordering a home energy audit after installation of your solar energy system will also provide valuable feedback on methods to further improve your home’s efficiency capabilities headed into the next several decades.

The benefits of solar power are clear and costs continue to fall. Is your home prepared for the future of energy? Find a solar installer in your area by visiting the North American Board of Certified Energy Practitioners and begin your journey to true energy independence today.

A Long Term Investment

One final note — choosing solar power for your home is a long term investment.  Review.com, a website dedicated to conducting unbiased and in-depth research about products and services, spent six weeks researching 188 contenders, consulting engineers and solar energy experts, and scouring user reviews and publications. They analyzed and compared the following;

  • Watts of power
  • Efficiency ratings
  • Customer service
  • Age of the companies

Ultimately, their research culminated in the recommendation of five solar panel companies.  In addition to those recommendations there is also a tremendous amount of information to soak up.


Credit to Drew Hendricks
Drew Hendricks is a tech, social media, and environmental addict. He’s written for many major publications, such as Forbes and Entrepreneur.
homes for rent, homes for sale,
newstarrealty.com
Please follow and like us:
error

10 Unconventional Tips To Help Minimize Home Allergies

If you’ve ever experienced coughing, sneezing, itchy eyes, a runny nose, a scratchy throat, rashes, hives, low blood pressure, breathing trouble or an asthma attack, allergies could be to blame. So is there a way to minimize home allergies?  Absolutely but let’s first take a look at the magnitude of the problem.

  • According to the Allergy and Asthma Foundation of America (AAFA), over fifty million Americans suffer from allergies today, including 30 percent of adults and 40 percent of children.
  • Allergies are among the country’s most common, yet often overlooked, diseases. Since there is no cure for allergies, prevention is key.

10 tips to minimize home allergies

While many people only concern themselves with certain times of the year, for others, “allergy season” is a year-round, dismal reality since allergens can be found indoors and outdoors. Reducing allergens in your home is a great first step towards prevention and optimal health. Your home should be a safe haven where you rest, rejuvenate and recuperate from daily stress and toxic exposures – but what you can’t see – can hurt you. Your home may, in fact, be harboring a broad range of allergy triggers.

From insects and furry companions to toxic, synthetic fragrances in cleaners, air fresheners and candles, it may be difficult to identify the exact source in the home causing your unwanted allergy symptoms. Why not prevent allergens from entering the home in the first place rather than treating or masking allergy symptoms? Awareness and simple action steps can result in profound changes for both your home and your health.

Here are 10 tips to minimize home allergies:

1.) Reduce clutter

Go on a paper cleanse and say sayonara to unwanted piles of  papers, books and magazines lurking in your bedroom, under your bed or in your home office. Keep only what you need, and recycle the rest. The same applies to cluttered shelves, cabinets and closets, which can be breeding grounds for insects, mold, rodents and their droppings.  You’re home will not only look better, you’ll feel better, too.

2.) Change the filters

Since biological contaminants like dust and dirt permeating your home’s air can’t be always be seen, it’s often overlooked. Be sure you are changing the furnace filter for your HVAC (heating and cooling) system every season; or every three months per the EPA’s recommendation. A high performance filter will capture over 95 percent of large airborne allergens such as mold spores, pollen, and dust mite debris from the air passing through it. Not only do these filters help maintain better airflow to reach your desired temperature, but will also reduce energy use resulting in savings on your bill.

3.) Wash linens naturally

Bright colorful linen.

Are you washing your bed linens in HOT water every two weeks (or more)? If not, your beloved bed is likely home to millions of dust mites – ewww! Be sure to wash your sheets and pillowcases in at least 140 degrees (Fahrenheit) to kill those nasty dust mites. You should also be seasonally washing your curtains, comforter, area rugs and duvets. Be sure to use a nontoxic detergent free of synthetic fragrance, petroleum based solvents and optical brighteners. I also recommend vacuuming the top of your mattress with a HEPA, airtight vacuum hose or handheld device. Also, let the sunlight hit your mattress and open the windows when changing your bedding. The sunlight will kill bacteria and absorb the moisture that creates a perfect breeding ground for dust mites.

4.) Bring the fresh air in

Road in a beautiful forest in the morning

Open the windows during non-allergy season to let your home breathe and allow for better circulation and removal of built up toxins, dust and debris. During allergy season, this isn’t always an option. Instead, place low-pollen plants such as Peace Lilies or Swedish Ivy, throughout the home and out of pets reach. In addition to removing CO2 and creating oxygen, these plants have been shown in studies by NASA to remove several toxic chemicals from the indoor air. Plants can gather dust, so it’s important to clean them regularly.

Also, be sure to keep moisture at bay by using exhaust fans after showering and when cooking to vent out particulates. Keep wet towels off the floor and fully dry them to avoid mold and mildew build up. I recommend a mildew resistant shower curtain such those made from hemp. If you live in a high moisture area, consider implementing a dehumidifier to keep humidity levels below 50 percent.

5.) Snuggle with a mate, not a mite

Since your skin is your largest organ, you want to make sure what you’r sleeping on will prevent unwanted dust mites. In addition to throwing your pillow in the dryer on high heat to kill dust mites (or washing, depending on the material of your pillow), you should definitely use an organic cotton pillow and mattress barrier cover if you have an allergy to dust mites. Avoid plastic barrier covers as these can off-gas dangerous VOC’s (volatile organic compounds) into the air.

6.) Clean greener

In addition to wet mopping and damp dusting to capture accumulated dust, avoid cleaning products that can agitate allergy symptoms. Instead, make your own from ingredients in your kitchen cabinets. A mixture of baking soda and natural dish soap makes a great tub, tile and toilet cleaner; while two parts water to one part white distilled vinegar can be used for streak-free windows and glass surfaces.

7.) Use an air purifier

If you don’t have a whole house air filtration system, then implementing a stand alone room air purifier is a must! A good unit will not only remove airborne allergens, but will also capture dangerous VOC’s, gases and odors from the air your breathe. Place this in your bedroom for optimal effectiveness.

New technology allows for air monitoring and air purification all in one system. One example is the
Dyson Pure Cool Link that detects and removes harmful pollutants and allergens in the air down to 0.3 microns. It’s an effective and convenient solution to reduce air pollutants and allergens as they emerge.

8.) Choose allergen friendly fabrics

Allergens could be permeating your bedding and wreaking havoc on your health. Some materials and fabrics are prone to harbor allergens, moisture, bacteria and dust mites. Down, for example, is one such material that should be avoided. It’s highly allergenic and the treatment to animals to create down is downright inhumane. Opt instead for wool which naturally wicks away moisture and acts as a natural flame retardant as well as natural (not synthetic) latex which is inherently dust mite resistant.

9.) Bare it on the floor

While it is warm and cozy underfoot, carpet can harbor all kinds of nasty things. Millions of microorganisms and over 120 nasty chemicals can be found in carpet backing, adhesives and the fibers themselves, as well as stain and water resistant treatments that have been applied to the carpet. Wall to wall carpeting is a no-no, especially in the bedroom and wet areas such as laundry and bathrooms. Choose hard surfaced flooring instead such as cork, FSC-certified hardwood flooring, concrete or ceramic tile. If you’re on a budget, look for linoleum or Marmoleum which is made from linseed oil (not vinyl flooring made from PVC which should be avoided at all costs). Carpet, in particular, harbors allergens and should be cleaned thoroughly with a HEPA vacuum and non-toxic cleaner.

10.) Make it a furry-free zone

We all love our animal companions, and many like them soo much they share the same bed. This can create allergic reactions from pet hair to pet dander. Establish rules from the beginning so your pet sleeps in his or her own (organic) bed. Also, you should shampoo and groom your pet with a nontoxic formula to protect their health (and yours).

Credit to Lisa Beres

Lisa Beres is a healthy home expert, Baubiologist, published author, professional speaker and Telly award winning media personality who teaches busy people how to eliminate toxins from their home with simple, step-by-step solutions to improve their health
homes for rent, homes for sale, newstarrealty.com
Please follow and like us:
error

4 Ways to a More Honest Sales Relationship

You’ve got the skills prospects are looking for, but to truly connect with them, you have to stop being a salesperson.

young architect team

What does it take to really connect with someone, to have them feel comfortable with you and truly trust you? Those are the people who will end up your customers for life, and those relationships will open doors to a multiple number of other contacts. But it takes being more than a good salesperson to connect with prospects on that level. Here are four strategies to build a deeper, purer relationship with potential clients.

Connect With Your Client, Not the Other Way Around

Your actions are most natural when you feel relaxed and confident in your own skin, and people can connect to that. But no matter how well trained you are, you’re not in your most natural state when you’re trying to make a sales pitch. Instead of trying to get a prospect to connect with you and your services, sometimes the best way to facilitate actions that are pure is to connect to them first — by listening.

When prospective clients ask me about what I do or how my experience will help them, I usually highlight the most important points of my job, as if I only have 60 seconds with them in an elevator. Then I say, “Before I get into more detail about that, I’d like to explore more about what your goals are.” I always turn it back on them until I have a good understanding of their key needs. Keeping the focus on the client allows you to customize your approach and gives you insight on when to move the conversation forward or back off.

That approach has also helped Lisa Lang, sales associate at Keller Williams Suburban Realty in Livingston, N.J. She says it’s imperative, especially in the beginning of a client relationship, to do more listening than talking. “I need to gain their respect and trust immediately. Otherwise, our relationship will falter,” Lang says. “Listening to them is a must. I have to hear what they have to say and what their needs are, and learn what kind of personality they have. I try to make our first meeting as casual as possible, whether it’s at an open house or at my office.”

Lang lets prospects drive the initial conversation, talking about more than just their real estate needs but also their families, current location, people they are affiliated with, and any common bonds she may share with them. “Once they feel at ease, everything else comes naturally,” she adds. “I never try to be someone I’m not.”

Stop Caring About the End Result

There is a saying I’ve tried to follow that is difficult to understand at first but has tremendous benefits for lasting relationships: “Those who desire nothing possess everything.” Now this doesn’t mean you don’t care for your customers or don’t have goals and dreams. It has to do with getting rid of your personal attachments and working from your true gut; it’s an approach to business and life that’s good not only for your success and peace of mind but also for your customers.

Too much caring and desire for winning get in the way of the performance. Your action is pure and comes naturally without thought. The key is detachment: Don’t think too much about it and just do it. When you don’t care so much about the end result, you can be at ease, and that’s when people feel comfortable around you.

One of my favorite books on this subject is Zen in the Martial Arts by Joe Hyams. Hyams tells a story of training with his sensei, who instructed him to punch a baseball mitt the sensei was wearing. As soon as Hyams got ready to punch, he tensed up. His sensei was aware of his intention, and he moved the mitt before Hyams could strike it.

“Relax,” the sensei said, according to the book. “Stop straining. The less effort, the faster and more powerful you will be.” As soon as Hyams relaxed his body and mind, he hit the target.

His sensei told him, “You stopped caring whether you hit or not. It is the caring or desire which stands in the way of effortless effort. You must stop caring about doing it and just do it — effortlessly and naturally as snow falls from the tree or water bubbles up from the spring.”

Eye Contact Is Powerful

We always hear how important it is to maintain eye contact. When you’re making a point or listening to your customer, it enables you to deliver the message with sincerity or see the truth in your customer’s eyes.

“The essence of the [client] relationship is how the transaction begins,” says Hal Maxwell, president of Coldwell Banker in New Jersey and Rockland County, N.Y. “You must build a relationship with trust and understanding immediately. You do that by eye contact, by being honest, by being who you are, telling people the truth and not just what they want to hear. If you’re sitting across from somebody who bought their home, and they paid at the height of the market, you can’t sugarcoat that. You have to tell them the truth, and you have to have something to show them and back it up.”

The truth may make your client angry, Maxwell says, but the anger isn’t directed at you. But your client’s anger will be about you if you tried to hide the truth. “Three or four months down the road, you come back and tell them that they have to do a major [price] reduction, and then they get mad at you because you didn’t tell them the truth up front.”

Maxwell says his company lives by three rules:

  1. No commission is worth your reputation.
  2. Do the right thing.
  3. When you give your word, you keep your word.

Follow Up

This is the glue that keeps the relationship together. Whether it’s a simple handwritten card thanking the individual for their time and business, or specific actions you take to ensure the long-term success of your client. Following up with a client after the sale is critical so they see that you’re there not just for a commission but to make sure they’re satisfied long with their decision.

This often leads to new business, referrals, testimonials, and a solid reputation. Email and other forms of follow-up are key, but an in-person meeting is the most powerful — where body language, eye contact, and a handshake can make all the difference.

“In this increasingly digital world, where email and texting have become the standard for business communication, the personal connection of a call — and, even better, a meeting — is more powerful than ever,” says Brian Stolar, president and CEO of real estate development firm The Pinnacle Companies. “One good meeting can be vastly more effective for finding a resolution to an issue or accomplishing a goal than dozens of digital messages. In important business relationships, a collaborator who knows that and practices it well and often is appreciated.”


Credit to Barry Farber

Barry Farber is a radio and television host with expertise in sales and marketing topics, as well as a marketing consultant for corporations, professional athletes, and entertainers. His brand of FoldzFlat® Pens can be used as a tool to break the ice with prospects or to follow up with clients along with a handwritten thank-you note.

newstarrealty.com
newstarrealty.com
Please follow and like us:
error

How To Get Your Security Deposit Back

Business man hands holding money

If you have ever been in a situation where you felt confident about getting all of your security deposit back, only to find that you were charged for areas you never even considered checking, this checklist is for you.

The coveted return of the security deposit, at the end of tenancy, can feel elusive to some renters. In fact, according to a Rent.com survey, 1 in 4 renters have not gotten their security deposit back when they expected to. The security deposit is not something that should leave your mind as soon as it’s paid, only to come back around at the end of your lease.

In most cases, a landlord will want to return the full security deposit back to you, because that means there was no damage or extra cleaning that needed to be done to the property. Be sure to be aware of the lease agreement throughout your tenancy, and be active about making sure you’ll get your deposit back. Ensuring that your security deposit is returned can require day-to-day tending to during your time as a tenant.

Follow Rental Agreement: Not all security deposit charges are due to direct abuse of property. Your landlord can charge for any work required to make the property look like it did before the start of tenancy. Additionally, a rental lease will include terms to further prevent property alterations and unauthorized changes to your rental.

Even if you consider a change, like a new paint job or new window treatments, upgrades, your landlord might disagree. If you do not have formal permission from your landlord, you could be charged for the living room’s new paint job, or the hole created to install that new curtain rod you put in.

Other lease-breaking damage charges can be caused due simply to negligence throughout your residence on the property. If you failed to change the air filter in the central air system, causing damage, or you didn’t keep the property clean—thus encouraging bugs, you could face a truncated return at the end of your lease.

deposit2

Deep Clean Before Leaving: Even if you factiously clean your rental, there are always problem areas that are left in the dust. Places like baseboards, the tops of cupboards, and under the entertainment center are rarely examined on a daily basis—and even more rarely cleaned.

Furthermore, high traffic areas can start to look dingy and dirty after a few years. Deep clean and pull out all the stops—use a steam mop, get on your hands-and-knees, and use that elbow grease to make your rental shine! Ensuring that your landlord won’t have to pay a professional cleaner because of a mess you leave behind, is a surefire way to increase your deposit return.

Alternatively, consider hiring your own cleaning service before moving. You will probably find a better rate if you contract a professional house cleaner, than if you leave it up to your landlord to find one with your security deposit fees. If you hate cleaning, or don’t feel like spending time scrubbing the floors during the moving chaos this may be the best option for you.

Touch Up Minor Damage: If you have areas with small holes in the wall from nails or screws, touch them up so your landlord does not need to. A landlord faced with minor damages, will also need to consider the time spent repairing them, save yourself the cash (and your landlord the hassle) by making it a non-issue from the start. Apply this same attentiveness to falling or lose hinges on the cupboards, or any other areas that might have small repairs that could be done. Consider this trick from Nestment, about re-caulking your bathroom to instantly make the shower look new again.

Finally, if you do find that you did not receive your deposit back, or only received a portion of the original amount knowing your rights as a renter can help you find out why you were charged. In most states, it is a requirement that the landlord inform their tenant in writing of the charges to your security deposit. If you live in a state that requires it, this required written document can help you learn what damages you need to avoid for the next time you rent, or can ensure that you were not charged for an issue that you shouldn’t have been.


Credit to Brentnie

Brentnie is a contributor for Rentec Direct. She occasionally stops by to deliver practical industry tips, providing guidance for tenants and landlords alike.

newstarrealty.com
newstarrealty.com
Please follow and like us:
error

How to Take Better Rental Listing Photos

Making photo or video with pad of old street in Tallinn, Estonia

It’s an old cliché, but everyone still loves to say it: “a picture is worth a thousand words” and trust us, when it comes to enticing potential tenants into making inquires, the old cliché rings a lot of truth.

Including quality photos in your rental listings is no longer a courteous extra, it is necessary. No longer are they the cherry-on-top for a listing, photographs of a rental can be the deciding factor in many potential tenants’ eyes.

Quality images of your rental’s best features and could be the difference between finding the perfect tenant quickly, or unneeded vacancies. Knowing this, it’s important to be able to represent your property with the best quality photographs you can.
Check Your Camera Settings

Planning to DIY your way through the rental listings and take your own photos? Be sure to use a camera that has the technology to sufficiently capture your property. Using an outdated and low end camera can cause blurry or grain-filled photos that distract from your rental rather than highlighting its best qualities. Poor images not only fail to highlight your rental’s best features, they express a sense of apathy and a lack of care toward your listing, a considerable deterrent to a potential tenant.

This isn’t to say that you need the finest equipment money can buy, many new cell phones have the capacity to take great images with the right planning. If you use an iPhone or your new smartphone, be sure to change your settings beforehand. Ensure that your camera’s files are not being compressed for storage on your device, and play around with the light settings to find the best representation of what your eyes see in the room.

Pro Tip:Many cameras have settings to input your light source: tungsten, cloudy, sunny ect. (often referred to as ‘white balance’) changing these settings will ensure that your rooms indoors do not look harsh and yellow or blue and dull.

Empty hotel room with king-sized bed

Use Natural Light

While you don’t need a fancy flash or studio light to achieve a nice white and clean image of your property, you do need to be aware of the do’s and do not’s of lighting. It is impossible to showcase your freshly painted white walls, when your photos all look dim and dingy.

To get the best possible look, take your photos in the daytime when you have a lot of natural light to work with. While this may be hard for some rooms or apartments that do not have a lot of windows, eliminate the use of lamps and ceiling lights.

Pro Tip: Open all the curtains, and even doors to make sure your room is as light as possible before taking your picture. This will make your room look brighter, cleaner and even bigger. 

Eliminate Clutter

The best time to take the photographs for your rental is after your normal reinventions and cleanings between tenants have taken place. However, if timing only allows for you to take the images mid-process, make sure to clear out any clutter, or cleaning materials. If your listing is furnished, don’t be afraid to rearrange the room specifically for the photo.

The most pleasing furniture arrangement for the photographs could be different than what logistically works best in day-to-day life—this is okay. Move the couch to new wall to create a new focal point—even if you know most tenants will prefer to face the TV hook-ups adjacent to the couch. As long as you’re not misrepresenting the listing’s assets, feel free to experiment to see ways that you re-arrange items to open the floor space and make the room more inviting.

Pro Tip: Potential renters respond positively to a house that is staged during their rental search process. A staged home is decorated to look its most beautiful for the purpose of selling or renting a house faster. Staged homes allow a person to see what the house looks like when someone lives there. If your house is empty, consider bringing in a couch, side table, flowers and a throw blanket to stage a cozy living room for a photo shoot.

interior2

Get Your Rental’s Good Side

Be sure to capture all the necessary shots: the living area, kitchen, bathrooms and bedrooms, but be sure to be discerning with what you include. If your rental has particularly beautiful landscaping, be sure to include a photo of just the garden. Was the kitchen newly remolded? Take a close up of the new counters and appliances.

Pro Tip: If you recently purchased top of the line appliance for your rental, it is not necessary to a picture of the appliance logo. You future tenant will appreciate a shot that shows the whole appliance so they can see that is actually new and fits the room nicely.

When to Leave it to the Experts

In some circumstances, despite a working knowledge of your camera, and the best intentions, there can be times when it might be worth it to call a professional. If you are noticing that your photos are not the quality you hoped for, or if you have a lot of rentals, it could be time to pick up the phone and call a photographer who specializes in property listings.

For any owner, the reality is that even the best DIY-er will be outmatched by the quality that a professional can offer, and that can translate to finding a tenant sooner. Extended vacancies can cost you more than a professional’s fee.

Pro Tip: For owners of multiple listings, the time investment required to do it yourself may not be achievable—and you can check around to see who offers a multiple property discount.

The next time your rental is ready to be listed, don’t hesitate to do what it takes to include great photos. By following our simple tricks, you’ll know precisely how to display your listing in the best light possible–literally and figuratively.


Credit to Brentnie

Brentnie is a contributor for Rentec Direct. She occasionally stops by to deliver practical industry tips, providing guidance for tenants and landlords alike.

newstarrealty.com
newstarrealty.com
Please follow and like us:
error

14 Common Home Problems Buyers Should Look For

Financial report and fountain pen

When looking for a home to buy, it pays to be aware of common problems found in many homes. Once you make the purchase, you take over responsibility for all of the existing issues in the home. Keep an eye out for these issues so you can adjust your offer accordingly, or move on to another property that is relatively problem-free.

If you are a perspective home seller reading this please make mental note of these common home sale issues so you can be well prepared to identify and address them before you put your home up for sale. You will be glad you did!

Building roof construction site teamwork silhouette

1. Roof Problems

The roof is one of the most important components of the home. A damaged or poorly maintained roof can lead to serious problems, including water damage. Major roof repairs can be expensive, and should definitely be factored into the price of the home if they exist. The roof is an area that most buyers will not compromise on. Keep in mind however that when you have a home inspection and your inspector tells you that there are only a few years of expected life in the roof, you shouldn’t expect the seller to replace it. Most sellers are not going to replace a roof when there are years of life left before issues arise.

2. Old Appliances

Appliances are built to last only so long, especially if they are not regularly maintained. The cost of replacing appliances can be substantial and should be considered. Granted, higher quality appliances last longer. It is worthwhile to do some research on the year, brand and model of the major appliances in a property to get a clear picture of what you are purchasing.

3. Handrails

This may seem minor, but functional handrails are necessary on staircases and along balconies for safety. Test all of the handrails in a home, and ensure that all appropriate areas have handrails before buying. One of the common trouble spots is on decks. This becomes especially important when the deck is elevated off of the ground where someone could get seriously hurt if falling from a greater height.

4. Storm Damage

Each area of the country experiences extreme weather – weather that can do serious damage to a home. From hurricanes to hail storms, these weather events can damage roofs, siding and even foundations in the event of flooding. Hail storms can be very destructive without a home owner even realizing it. A few years ago in Hopkinton Massachusetts, over a third of the homes in town received new roofs because of a vicious hail storm.

This is something that most good homeowners insurance policies will cover. Unfortunately there were also a number of people in Hopkinton who did not even think to check that they had hail damage. Upon selling their home, the buyer would get a home inspection and that’s when they found out they had damage. For many of these home sellers it was too late to file a claim. The tough part of hail damage is that it is not often visible to the naked eye. A good home inspector will be able to spot hail damage by getting up on the roof or possibly by using high-powered binoculars.

check4

5. Rotten Wood

Even modern, pressure-treated wood will break down under the elements eventually. Look for rotten wood around the base of the home, along the roof and anywhere else where moisture may have been an issue. Some of the most common areas you will find wood rot on a home are on the window sills.

While rotted window sills can be found on any age home, there has been a prevalence of it in homes that were built in the 80’s and 90’s due to lesser-quality, finger-jointed woodwork. Finger-jointed materials, if not constantly painted, will rot a lot more quickly due to water penetration and just an overall lack of quality.

6. Cooling or Heating Systems

Temperature control systems wear out over time, and they can be expensive to replace. Check on the age, integrity and maintenance schedule of any heating or cooling system present in the home. Newer models are notably more efficient, making them a much better deal in the long run.

One of the most important things you can do as a home buyer is to check the current owners’ upkeep of these items. It is certainly possible a well-maintained boiler can last thirty years or more. It is just as easy for that same boiler to last half as long if not maintained yearly with regular servicing.

7. Environmental Issues

Environmental regulations become increasingly strict as time goes on. This is good for buyers of new homes, but it does not necessarily protect you if you are purchasing an older home. Radon, lead-based paint, mold and asbestos are all health concerns.

Be aware of the dangers of these materials and verify  whether they are present in each property. If the home is serviced by a well (as opposed to public water), it is also a good idea to get that tested too. Often times standard well tests will only do a limited screening for such things as iron, copper, manganese, etc. You will want to make sure you also test for more dangerous compounds such as arsenic, mercury and lead.

8. Poor Drainage

Water damage is a risk in areas with poor drainage. Verify that each home you consider has adequate drainage to deal with area rainfall. Because water damage can lead to expensive repair work and mold infestation, you need to ensure that drainage is sufficient on any property you purchase. This is one issue as a home seller not to mess with. There is nothing that will kill a real estate sale quicker than a water issue. Buyers do not want to even think about having a water problem with their home.

9. Electrical Safety Concerns

Older homes may not have electrical systems up to current codes. Things like ground fault breaker outlets in bathrooms and kitchens, as well as grounded outlets throughout the house are necessary for a safe living environment, especially when you consider the current electrical load people put on their homes with new appliances and electronics. In older homes look out for knob and tube wiring.

Most lenders will not provide a loan and most insurance companies will not ensure a home with knob and tube wiring. Eliminating a huge chunk of the buyer pool is not going to help you get top dollar for your home. This is an issue you would want to address before listing your home for sale.

10. Roof Water Control

Gutters may seem like a minor part of a home, but they do a very important job in keeping your house free from water intrusion. Clogged or poorly maintained gutters can leave your home exposed to water and the mold that comes along with it. Sellers that have plants growing in their gutters bring negative attention to their homes. It looks like you could care less about the upkeep of your property and makes buyers look more closely at other potential problems.

check2

11. Plumbing Problems

Plumbing may be hidden from site in homes, but it is a large part of what makes the modern home livable and comfortable. Older homes with older pipes can present problems, though. Make sure your potential home has plumbing that works, and no serious plumbing issues right around the corner. Things like tree root growth can quickly stop up your plumbing and may be a problem with older pipes.

12. Bad Insulation

Modern insulation is excellent at keeping the temperature in your home comfortable. However, some home builders, especially in older homes, did not always insulate adequately. If you view a home in summer, you may be surprised come winter when the house will just not hold heat. Have someone who knows verify that the home has good insulation before you buy. It is common for older homes to not have nearly the same energy efficiency due to lack of insulation in walls and sometimes in the attic as well.

13. Poor Ventilation

A home that does not allow airflow is at risk of developing mold problems, a nightmare for any homeowner. Verify that the home you are looking at allows airflow throughout the house, including the attic. It may be impossible to achieve perfect airflow in every room, especially basements, but the home should allow airflow through most rooms of the house.

One of the most notable home imperfections is a bathroom vent dumping into the attic and not out through the roof. While a bathroom being vented through the roof is now code in most states, this was not the case until recently. It is very common to see homes that have venting leading into the attic, creating the perfect environment for moisture and mold growth.

14. Foreclosed Homes

Foreclosures may initially present an excellent deal, but they also present certain risks. Sometimes earlier owners will do serious damage to such homes before exiting the property. This can include anything from stripping copper piping to tearing out cabinets or other valuable fixtures.

Always look over the property before getting your hopes up, because sometimes you do get what you pay for. When real estate deals seem to good to be true they usually are! Keep in mind when you purchase a foreclosed home the lender who now owns the home generally will know very little about the previous owners’ upkeep and maintenance.

The Help of Someone Who Knows

If these 14 things seem like a lot to keep track of, it is because they are. This is why the help of an experienced professional real estate agent can prove so valuable. They look for such things as a matter of course. However, if you choose to go it alone, make sure to download a home viewing checklist to make sure you cover all of your bases before making an offer.

These are all common items that can certainly be discovered at a home inspection by a qualified home inspector. As a buyer, you should be making mental notes of these items before hand so you can make an offer and budget accordingly. When you are mentally prepared for these types of issues when purchasing real estate, there will be a lot less stress involved with your transaction should one or more of these problems crop up. Don’t lose your cool when you find a problem. Take it slow and do the necessary research to resolve the problem by speaking with a few reputable contractors and getting necessary estimates for repair.

Credit to Bill Gassett
Bill Gassett is a nationally recognized real estate leader who has been helping people move in and out of the Metrowest Massachusetts area for the past twenty six plus years. He has been one of the top RE/MAX REALTORS® in New England for the past decade. In 2012 he was the #1 RE/MAX agent in all of New England.

NS_Blog_Web_Banner

Please follow and like us:
error

6 things every new real estate agent should do

It’s exciting to get your real estate license! The information presented in the prelicensing class can be a bit overwhelming (and utterly useless in your marketplace), but it’s all part of the coursework. You study and stress, stress and study, then pass your state licensing exam. When you learn that you’ve passed the test, you are elated and can’t wait to get started … but you learn fairly quickly that you don’t know where to start.

So here are the six things you should do:

Real estate puzzle

1. Select a broker.

Broker selection is critical. Your broker is the one who will help you map out your path to success.

You’ll want to interview a few brokers to compare what each of them has to offer in terms of compensation, knowledge, leadership and training. It may be tempting to sign with the broker offering the highest compensation package, but the other three traits are much more important to consider. If you don’t work with a knowledgeable broker who has strong leadership skills and who offers training, then you are less likely to reach your goals because you won’t learn the skills it takes to be a successful real estate agent.

2. Do more listening.

As a new agent, you have a lot of questions about what to do and how things are done. You have thought about how you want to work and where your business will come from, and all you want to do is get started. Because you don’t know what you don’t know, talk to your broker to see whether they have a 30-day program you can follow to get your business up and running. Although you may be anxious to share your ideas, try to listen more than you talk. Your ideas could be interesting but ultimately unrealistic. Listening to advice from your broker and other successful agents in your office about how to start your business is invaluable.

3. Get the word out.

Now that you’ve become an agent, you’ll want to get the word out. One of the best ways to start is by sending those on your list a handwritten message. It can be a simple three-sentence note simply letting your friends know that you have become a real estate agent and would appreciate it if they would keep you in mind for future business. Before you say that a handwritten note wouldn’t work for your people, give it a try. Because handwritten notes are so rare, recipients absolutely love them. It’s a welcome change from the usual bills they receive in the mail!

4. Learn the neighborhoods.

Many experienced agents have a niche or are known as experts in a certain neighborhood. As a new agent, you don’t have the luxury of having a niche; you just need some business. To better serve your clients, you will need to know the majority of the neighborhoods in your market. What are the house styles, price points and amenities? Since you don’t have many (or in some cases any) clients, use this time to learn the ins and outs of as many neighborhoods and possible. This information will serve you well as you assist visitors at an open house or when answering calls when sitting on floor or desk duty.

5. Be patient.

The average real estate agent sells one or two properties their first year in the business. About 75 percent of new agents fail in that first year. It is important to understand that you are building a business, and it takes time. Every successful agent you see had to start in the same place you are starting.

Continue to work on your business every day. Be patient. As you increase your knowledge, your confidence will increase. And as you grow more confident you will want to talk to more people. That is how your business will grow.

6. Find opportunities to learn.

Understand that not everything will go your way. Your friends and family will not always work with you. You will not get a great lead every time you sit on floor or desk duty. You may have zero visitors at the open house you are working. But all of these issues that appear to be setbacks enable you to improve how you run your business. Just because you don’t get a hot lead doesn’t mean that you can’t hone your telephone skills with those who do call in. When working an open house, you had to research the neighborhood and the other listings in that neighborhood, so you learned something new. Everything you do is an opportunity to learn.

Credit to Candy Miles-Crocker

Candy Miles-Crocker, “The Real-Life Realtor”, mentors and coaches new and experienced real estate agents to transform their business by mastering her proven systems for success. She is a firm believer in managing expectations and her goal is to elevate the perception of real estate agents among the general public through education. Candy’s unique training methods have shown agents what it takes to be successful!

NS_Blog_Web_Banner

Save

Please follow and like us:
error

9 Tax Deductions Every Real Estate Agent Should Know

Tax business

Closing a real estate sale requires a big investment of your time and money. Whether expenses are business, personal, or something in between can be unclear — leading to missed deductions and overpayment of taxes.

This is key knowledge regardless of who’s doing your taxes. Understanding which expenses are allowed will help you deduct with confidence and avoid overpaying on your quarterly and year-end taxes, no matter where you are in your career.

1. Vehicle Mileage or Expense

You spend your days driving between properties and appointments. How do you determine whether to go with the standard mileage deduction or track all your auto-related expenses? If you drive 10,000 miles or more per year for your real estate business, you will most likely get the greatest tax benefit by taking the standard mileage deduction.

The IRS requires you to keep a detailed log in order to claim this deduction, which includes date, time, mileage and purpose of the trip. Mileage tracking apps can streamline this process, automatically capturing trip date, length, and time of day for easy categorization.

If you are a lower mileage driver, or have especially high car payments, the actual cost method may yield a higher deduction. The two methods can be compared in more detail in this article.

2. Marketing and Advertising

To be a success and scale their business in a predictable way, most real estate professionals invest heavily in marketing and advertising. Remember that you can deduct not only the direct cost of promotions such as business cards, flyers, signs, ads, and promos but also the production costs, such as writing and design fees, whether the materials are produced by an agency or part-time hire.

Digital and online advertising costs are quickly becoming the greatest area of spending. This includes website design and hosting fees, search engine marketing, pay per click advertising, video production, and any other IT-related costs. Be sure to track all these business expenses.

3. Home Office Deduction

Do you have a dedicated area of your home for work? If so, you’re eligible for a home office deduction even if you also have office space at your broker’s office — unless you’re deducting desk fees already (see more below). Like the vehicle deduction, the home office deduction offers an option: the regular method or a simplified method. Most self-employed people find that the simplified method maximizes their deduction. However, if you have a particularly large home office, or live in a very high-cost area, the regular method — in which you track actual expenses — may yield the highest deduction.

4. Desk Fees

Whether you are hanging your license under a national franchise or with an independent broker, your desk fees are deductible. Note, however, that if you are taking a deduction for brokerage desk fees, you will not be able to claim the home office deduction.

5. Office Supplies and Equipment

Regardless of which office deduction you take, you can claim other office-related expenses, such as stationery, photocopies, and any other consumables needed to run your business. Other large purchases that can be expensed in full – or depreciated over a number of years –include furniture, fax machines, copiers, computers, or you telephone and associated bill.

If you have a dedicated landline telephone for business, you can fully deduct this expense. Increasingly, agents are using a cell phone for both business and personal use. If you do, you are eligible to deduct only the business percentage of that expense.

6. Meals and Entertainment

There are two situations in which you can deduct meals as a business expense: when you are travelling on business and when you are dining with clients or with other professionals for the purpose of conducting business or generating referral business. In either case, you can deduct 50 percent of your total expense, which includes tax and tip for the meal. In the case of business entertainment, you are allowed to take the meal deduction only if business was discussed during the meal, or immediately before or after.

In the case of events that are provided to the general public, such as a well-advertised open house, you are able to deduct 100 percent of the cost of refreshments and food.

Insurance banking

7. Fees, Licenses, Memberships and Insurance

Annual fees are a common costs of doing business and are deductible. In real estate, that means your state license renewal, professional memberships, and MLS dues. An important caveat with regard to professional memberships: The portion of your membership dues attributable to lobbying and political advocacy is not deductible.  General business insurance and Errors and Omissions (E&O) insurance are both fully deductible business expenses. Additionally, you can deduct real estate taxes necessary for your business, but not self-employment taxes.

8. Professional Development and Travel

Given rapid industry change, continuing education is a great way to stay competitive. It’s also a requirement in most states. Many real estate professionals pursue professional development through classes, trade shows, conferences, or coaching. If you need to travel to attend an event or meet with a coach you may be able to deduct those transportation and/or accommodation costs.

9. Software and Business Tools

Any software needed to run your business is fully deductible – including lead generation subscription services such as customer-relationship management (CRM) software. Products such as QuickBooks Self-Employed not only help you automatically track your expenses and mileage, but may be fully deducted as well.


Credit to QuickBooks Self-Employed

QuickBooks Self-Employed helps real estate professionals like you keep more of what you earn. Categorize business expenses with a single swipe and let our mobile app track your mileage while you drive. When it’s time to file your taxes, QuickBooks Self-Employed integrates seamlessly with TurboTax and your accountant. With your business income and expenses in one place, you’ll always know where your business stands.

NS_Blog_Web_Banner

Please follow and like us:
error

10 Tips To Get Your Property Ready For Summer

It’s time to get your apartment complexes and rental properties ready for summer.

Close-up shot of female hands holding small house model on the background of defocused green nature. Real estate, mortgage, eco or country house concept

The warm weather means your residents want to get outside and enjoy the community features you offer.  Any pool areas, bbq pits, and picnic areas should be ready and inviting for summertime use and the social atmosphere that makes your property stand out.

Make sure you and rentals are ready for summer with these tips:

Little cute baby girl in blue water of the swimming pool, summer time for fun

  1. Pool Safety – Get the pool cleaned and in prime condition for summertime splashes. If you do not have a lifeguard on duty, check to make sure your posted safety signs are visible and aren’t faded by winter weather or the sun.  Check that locks and gates are in good condition to further protect young residents in your community.
  2. Fill the Propane – Nothing can kill a summer BBQ faster than a grill that runs out of fuel in-between burger flips. If you want your residents to use the community space you provide, make sure the propane tank is full and keep an extra on hand, in case your residents need to make a quick switch.
  3. Pull out the summer maintenance checklist– Each season calls for different routine maintenance. Your team should be prepared to add summer chores to their to do list like: servicing the pool, cleaning grills, organizing outdoor community areas, adjusting the irrigation system, and getting ready for A/C maintenance calls.
  4. Set Your Water – When the temperatures start to rise, servicing the irrigation system can result in big savings on water usage, prevent landscape damage, and reduce standing water.  You should also program your sprinkles to optimal summer use settings, to keep your landscape looking fresh and reduce over watering.
  5. Fire Wise – Make sure your property is prepped for high heat and that fire dangers are removed. Outside bushes and trees should be trimmed backed and dead plants removed. Additionally, make sure any grills owned by the property or your tenants are properly ventilated and positioned away from buildings. Make sure to double check your local laws about fire extinguisher requirements for landlords.
  6. Service the Air Conditioners – Enlist the help of a professional to service the A/C unit at least once a year. They will be able to check the unit, clean coils, adjust dampers, and look for any other potential problems. It is also important to remove trees, debris, or trash that can obstruct proper operation. These measures can prolong the life of a heating and air system.
  7. Check chairs, umbrellas and tables – Multifamily renters are about to spend more time outdoors, that means any chairs, tables and umbrellas are going to get a lot of use. Your property will be more inviting and safer if those community fixtures work properly.
  8. Send a Friendly Rule Reminder to Residents – The warm weather and late sunset times brings people outside late into the night. Remind your residents of the complex’s quiet hours and any rules about using the pool, grills, and community amenities. Make sure to include information about your guest policies and parking.
  9. Check Your State and Local Requirements – Did you know that in Washington, D.C. the housing code requires landlords to put screens on windows and doors from March 15 through November 15 to protect tenants from insects and pests? Make sure you are following state and local laws for seasonal requirements like this for landlord compliance.
  10. Don’t Forget About Renewals – With all the fun your residents are having this summer, take advantage of asking for renewals while spirits are high. Try hosting a community event, like a BBQ or pool party, and offer renewal incentives.  The more your remind your tenants about how much fun it is to live in your property, the more likely they will stay.

When it comes to summer at your rental properties, remember to prioritize safety by encouraging your tenants to socialize and enjoy themselves responsibly this season.


Credit to Kaycee

Kaycee manages marketing and media relations for Rentec Direct, bringing a unique perspective to the world of property management and proudly shares industry news, products, and trends within the community

NS_Blog_Web_Banner

Save

Please follow and like us:
error

10 Ways to Keep Your Home Cool This Summer

beach scene in st. peter-ording / germany

If you don’t have an A/C unit, want to keep your electricity costs down, or simply don’t trust your property’s outdated cooling system to work efficiently, we’ve put together the top simple and affordable tips for keeping your house cool this summer.

  1. Switch your ceiling fans. Change your ceiling fan setting so the blades turn counter-clockwise in the summer. This seasonal fan adjustment will force air down into the room creating a windchill effect, that will make the room feel cooler (even if it isn’t). Check out this video for how to easily change your ceiling fan’s direction of rotation.
  2. Change Your Bulbs. Traditional incandescent bulbs turn about 90 percent of the electricity they use into heat, and only 5 to 10 percent into light. By switching to fluorescent, compact fluorescents or LED lightbulbs your lighting systems won’t be adding unwanted heat inside your home. Plus these types of bulbs last longer and use less energy so you’ll be saving money in the long run beyond your cooling bill. Not sure you want to commit to higher priced LED bulbs, Lloyd Alter provides a great explanation of the different types of LEDs and his experience converting his home to 100% LED lighting for treehugger.com.Electrical bulb, white light isolated
  3. Turn off the lights. Even better than changing your lightbulbs, try to use as little artificial lighting as possible. The longer days means you can rely on natural sunlight to see throughout the day. So flip the switch when you leave a room and let daylight be your guide during your summer activities.
  4. Unplug electronics. Although seemingly minimal, your electronics still use electricity when they are plugged in and not turned on. Try unplugging your tv, chargers and computers when they aren’t in use, to avoid the passive heat generation.
  5. Don’t touch Your stove – It’s time to get creative with your summertime meal prep. Using your stove or oven in the summer can significantly increase the inside temperature of your house. After all the work you’ve spent trying to keep hot air from coming inside, why would you reverse it by making heat source from within.There is a reasons grilled foods are associated with summer, so it’s time to fire up the bbq. For stovetop cooking, try using an electric skillet setup outside for easy cooking options. You can essentially make anything that you would saute or pan fry in an electric skillet without ever needing to touch your stove. If you don’t have an outdoor patio to keep the heat outdoors, instead of cooking on skillet, you can try using your slow cooker at night, so the appliance is on during the coolest part of the day, resulting in minimal house heating.
  6. Install Blackout window curtains. Keeping your blinds or curtains closed during the summer essentially prevents your home from becoming a miniature greenhouse, especially if you have a south- or west- facing windows. Adding blackout curtains to your windows can provide additional protection for keeping the heat out during the summer. The Department of Energy claims that, “Studies demonstrate that medium-colored draperies with white-plastic backings can reduce heat gains by 33%. Check out more elaborate energy-efficient window treatments for keeping out summertime heat at Energy.gov.
  7. Consider Outdoor Window Treatments. Hang tightly woven screens or bamboo shades outside the window during the summer to stop 60 to 80 percent of the sun’s heat from getting to the windows.  If you rent your property, make sure to check with your landlord or HOA about allowable outdoor window coverings.
  8. Open Up the Windows (at night). You can help get rid of unwanted heat through ventilation if the temperature is lower outside than it is inside. To facilitate ventilation, window fans should be located on the downwind side of the house facing out. A window should be open in each room. Interior doors must remain open to allow air flow.
  9. Try this fan hack. Fill a mixing bowl with ice (or something equally cold, like an ice pack or ice block) and position it at an angle in front of a large fan, so that the air whips off the ice at an extra-chilled, extra-misty temperature. Trust us: it’s magic.Put a block of ice (in a pan big enough to catch the melted volume of water) in front of the fan. Makeshift air conditioning!
  10. Tint your windows. If you don’t want to commit to new window treatments or hate the idea of keeping the outdoors out of view all summer long, try a temporary tinting solutions for your windows. Gila makes window film that clings to your window as a temporary heat reducing fix.

Credit to  Kaycee

Kaycee manages marketing and media relations for Rentec Direct, bringing a unique perspective to the world of property management and proudly shares industry news, products, and trends within the community. More from this author.


NS_Blog_Web_Banner

Please follow and like us:
error