Tag Archives: tips

How To Get Your Security Deposit Back

Business man hands holding money

If you have ever been in a situation where you felt confident about getting all of your security deposit back, only to find that you were charged for areas you never even considered checking, this checklist is for you.

The coveted return of the security deposit, at the end of tenancy, can feel elusive to some renters. In fact, according to a Rent.com survey, 1 in 4 renters have not gotten their security deposit back when they expected to. The security deposit is not something that should leave your mind as soon as it’s paid, only to come back around at the end of your lease.

In most cases, a landlord will want to return the full security deposit back to you, because that means there was no damage or extra cleaning that needed to be done to the property. Be sure to be aware of the lease agreement throughout your tenancy, and be active about making sure you’ll get your deposit back. Ensuring that your security deposit is returned can require day-to-day tending to during your time as a tenant.

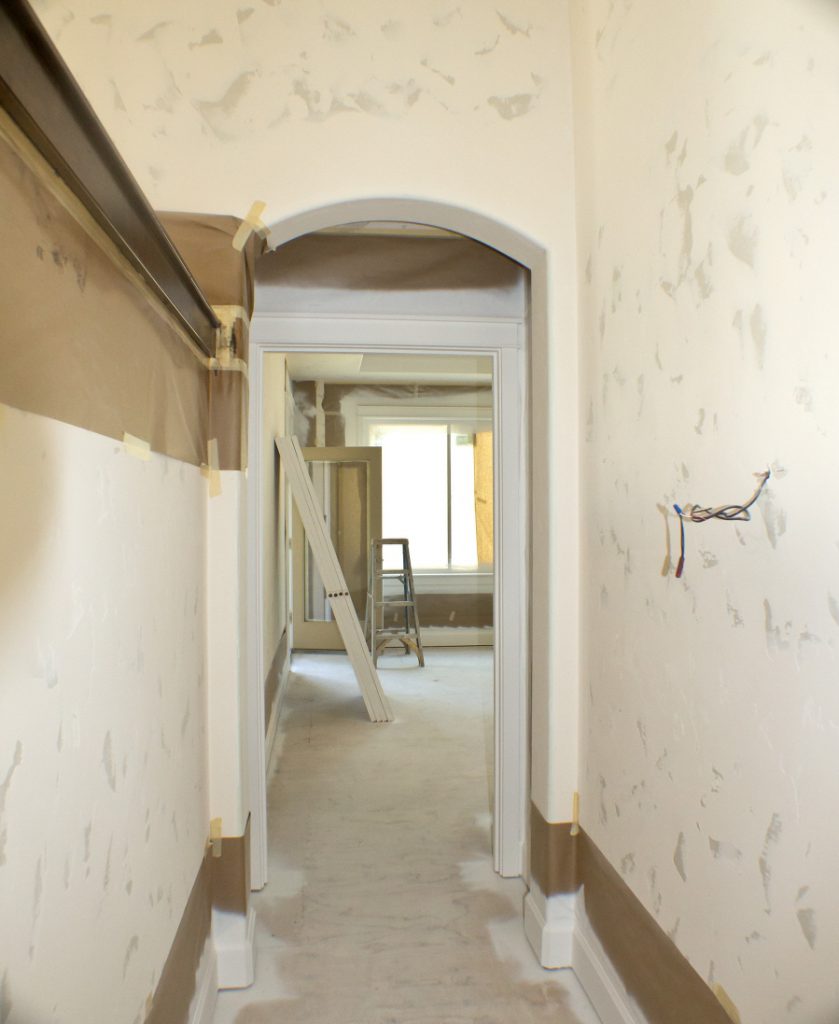
Follow Rental Agreement: Not all security deposit charges are due to direct abuse of property. Your landlord can charge for any work required to make the property look like it did before the start of tenancy. Additionally, a rental lease will include terms to further prevent property alterations and unauthorized changes to your rental.

Even if you consider a change, like a new paint job or new window treatments, upgrades, your landlord might disagree. If you do not have formal permission from your landlord, you could be charged for the living room’s new paint job, or the hole created to install that new curtain rod you put in.

Other lease-breaking damage charges can be caused due simply to negligence throughout your residence on the property. If you failed to change the air filter in the central air system, causing damage, or you didn’t keep the property clean—thus encouraging bugs, you could face a truncated return at the end of your lease.

deposit2

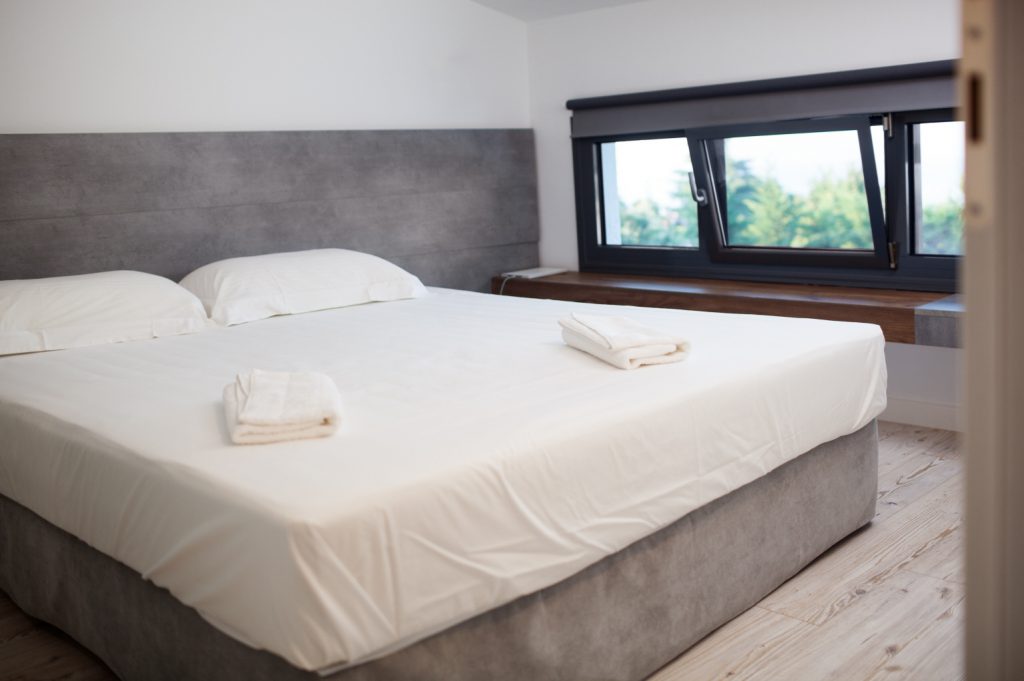
Deep Clean Before Leaving: Even if you factiously clean your rental, there are always problem areas that are left in the dust. Places like baseboards, the tops of cupboards, and under the entertainment center are rarely examined on a daily basis—and even more rarely cleaned.

Furthermore, high traffic areas can start to look dingy and dirty after a few years. Deep clean and pull out all the stops—use a steam mop, get on your hands-and-knees, and use that elbow grease to make your rental shine! Ensuring that your landlord won’t have to pay a professional cleaner because of a mess you leave behind, is a surefire way to increase your deposit return.

Alternatively, consider hiring your own cleaning service before moving. You will probably find a better rate if you contract a professional house cleaner, than if you leave it up to your landlord to find one with your security deposit fees. If you hate cleaning, or don’t feel like spending time scrubbing the floors during the moving chaos this may be the best option for you.

Touch Up Minor Damage: If you have areas with small holes in the wall from nails or screws, touch them up so your landlord does not need to. A landlord faced with minor damages, will also need to consider the time spent repairing them, save yourself the cash (and your landlord the hassle) by making it a non-issue from the start. Apply this same attentiveness to falling or lose hinges on the cupboards, or any other areas that might have small repairs that could be done. Consider this trick from Nestment, about re-caulking your bathroom to instantly make the shower look new again.

Finally, if you do find that you did not receive your deposit back, or only received a portion of the original amount knowing your rights as a renter can help you find out why you were charged. In most states, it is a requirement that the landlord inform their tenant in writing of the charges to your security deposit. If you live in a state that requires it, this required written document can help you learn what damages you need to avoid for the next time you rent, or can ensure that you were not charged for an issue that you shouldn’t have been.


Credit to Brentnie

Brentnie is a contributor for Rentec Direct. She occasionally stops by to deliver practical industry tips, providing guidance for tenants and landlords alike.

newstarrealty.com
newstarrealty.com
Please follow and like us:
error

How to Take Better Rental Listing Photos

Making photo or video with pad of old street in Tallinn, Estonia

It’s an old cliché, but everyone still loves to say it: “a picture is worth a thousand words” and trust us, when it comes to enticing potential tenants into making inquires, the old cliché rings a lot of truth.

Including quality photos in your rental listings is no longer a courteous extra, it is necessary. No longer are they the cherry-on-top for a listing, photographs of a rental can be the deciding factor in many potential tenants’ eyes.

Quality images of your rental’s best features and could be the difference between finding the perfect tenant quickly, or unneeded vacancies. Knowing this, it’s important to be able to represent your property with the best quality photographs you can.
Check Your Camera Settings

Planning to DIY your way through the rental listings and take your own photos? Be sure to use a camera that has the technology to sufficiently capture your property. Using an outdated and low end camera can cause blurry or grain-filled photos that distract from your rental rather than highlighting its best qualities. Poor images not only fail to highlight your rental’s best features, they express a sense of apathy and a lack of care toward your listing, a considerable deterrent to a potential tenant.

This isn’t to say that you need the finest equipment money can buy, many new cell phones have the capacity to take great images with the right planning. If you use an iPhone or your new smartphone, be sure to change your settings beforehand. Ensure that your camera’s files are not being compressed for storage on your device, and play around with the light settings to find the best representation of what your eyes see in the room.

Pro Tip:Many cameras have settings to input your light source: tungsten, cloudy, sunny ect. (often referred to as ‘white balance’) changing these settings will ensure that your rooms indoors do not look harsh and yellow or blue and dull.

Empty hotel room with king-sized bed

Use Natural Light

While you don’t need a fancy flash or studio light to achieve a nice white and clean image of your property, you do need to be aware of the do’s and do not’s of lighting. It is impossible to showcase your freshly painted white walls, when your photos all look dim and dingy.

To get the best possible look, take your photos in the daytime when you have a lot of natural light to work with. While this may be hard for some rooms or apartments that do not have a lot of windows, eliminate the use of lamps and ceiling lights.

Pro Tip: Open all the curtains, and even doors to make sure your room is as light as possible before taking your picture. This will make your room look brighter, cleaner and even bigger. 

Eliminate Clutter

The best time to take the photographs for your rental is after your normal reinventions and cleanings between tenants have taken place. However, if timing only allows for you to take the images mid-process, make sure to clear out any clutter, or cleaning materials. If your listing is furnished, don’t be afraid to rearrange the room specifically for the photo.

The most pleasing furniture arrangement for the photographs could be different than what logistically works best in day-to-day life—this is okay. Move the couch to new wall to create a new focal point—even if you know most tenants will prefer to face the TV hook-ups adjacent to the couch. As long as you’re not misrepresenting the listing’s assets, feel free to experiment to see ways that you re-arrange items to open the floor space and make the room more inviting.

Pro Tip: Potential renters respond positively to a house that is staged during their rental search process. A staged home is decorated to look its most beautiful for the purpose of selling or renting a house faster. Staged homes allow a person to see what the house looks like when someone lives there. If your house is empty, consider bringing in a couch, side table, flowers and a throw blanket to stage a cozy living room for a photo shoot.

interior2

Get Your Rental’s Good Side

Be sure to capture all the necessary shots: the living area, kitchen, bathrooms and bedrooms, but be sure to be discerning with what you include. If your rental has particularly beautiful landscaping, be sure to include a photo of just the garden. Was the kitchen newly remolded? Take a close up of the new counters and appliances.

Pro Tip: If you recently purchased top of the line appliance for your rental, it is not necessary to a picture of the appliance logo. You future tenant will appreciate a shot that shows the whole appliance so they can see that is actually new and fits the room nicely.

When to Leave it to the Experts

In some circumstances, despite a working knowledge of your camera, and the best intentions, there can be times when it might be worth it to call a professional. If you are noticing that your photos are not the quality you hoped for, or if you have a lot of rentals, it could be time to pick up the phone and call a photographer who specializes in property listings.

For any owner, the reality is that even the best DIY-er will be outmatched by the quality that a professional can offer, and that can translate to finding a tenant sooner. Extended vacancies can cost you more than a professional’s fee.

Pro Tip: For owners of multiple listings, the time investment required to do it yourself may not be achievable—and you can check around to see who offers a multiple property discount.

The next time your rental is ready to be listed, don’t hesitate to do what it takes to include great photos. By following our simple tricks, you’ll know precisely how to display your listing in the best light possible–literally and figuratively.


Credit to Brentnie

Brentnie is a contributor for Rentec Direct. She occasionally stops by to deliver practical industry tips, providing guidance for tenants and landlords alike.

newstarrealty.com
newstarrealty.com
Please follow and like us:
error

14 Common Home Problems Buyers Should Look For

Financial report and fountain pen

When looking for a home to buy, it pays to be aware of common problems found in many homes. Once you make the purchase, you take over responsibility for all of the existing issues in the home. Keep an eye out for these issues so you can adjust your offer accordingly, or move on to another property that is relatively problem-free.

If you are a perspective home seller reading this please make mental note of these common home sale issues so you can be well prepared to identify and address them before you put your home up for sale. You will be glad you did!

Building roof construction site teamwork silhouette

1. Roof Problems

The roof is one of the most important components of the home. A damaged or poorly maintained roof can lead to serious problems, including water damage. Major roof repairs can be expensive, and should definitely be factored into the price of the home if they exist. The roof is an area that most buyers will not compromise on. Keep in mind however that when you have a home inspection and your inspector tells you that there are only a few years of expected life in the roof, you shouldn’t expect the seller to replace it. Most sellers are not going to replace a roof when there are years of life left before issues arise.

2. Old Appliances

Appliances are built to last only so long, especially if they are not regularly maintained. The cost of replacing appliances can be substantial and should be considered. Granted, higher quality appliances last longer. It is worthwhile to do some research on the year, brand and model of the major appliances in a property to get a clear picture of what you are purchasing.

3. Handrails

This may seem minor, but functional handrails are necessary on staircases and along balconies for safety. Test all of the handrails in a home, and ensure that all appropriate areas have handrails before buying. One of the common trouble spots is on decks. This becomes especially important when the deck is elevated off of the ground where someone could get seriously hurt if falling from a greater height.

4. Storm Damage

Each area of the country experiences extreme weather – weather that can do serious damage to a home. From hurricanes to hail storms, these weather events can damage roofs, siding and even foundations in the event of flooding. Hail storms can be very destructive without a home owner even realizing it. A few years ago in Hopkinton Massachusetts, over a third of the homes in town received new roofs because of a vicious hail storm.

This is something that most good homeowners insurance policies will cover. Unfortunately there were also a number of people in Hopkinton who did not even think to check that they had hail damage. Upon selling their home, the buyer would get a home inspection and that’s when they found out they had damage. For many of these home sellers it was too late to file a claim. The tough part of hail damage is that it is not often visible to the naked eye. A good home inspector will be able to spot hail damage by getting up on the roof or possibly by using high-powered binoculars.

check4

5. Rotten Wood

Even modern, pressure-treated wood will break down under the elements eventually. Look for rotten wood around the base of the home, along the roof and anywhere else where moisture may have been an issue. Some of the most common areas you will find wood rot on a home are on the window sills.

While rotted window sills can be found on any age home, there has been a prevalence of it in homes that were built in the 80’s and 90’s due to lesser-quality, finger-jointed woodwork. Finger-jointed materials, if not constantly painted, will rot a lot more quickly due to water penetration and just an overall lack of quality.

6. Cooling or Heating Systems

Temperature control systems wear out over time, and they can be expensive to replace. Check on the age, integrity and maintenance schedule of any heating or cooling system present in the home. Newer models are notably more efficient, making them a much better deal in the long run.

One of the most important things you can do as a home buyer is to check the current owners’ upkeep of these items. It is certainly possible a well-maintained boiler can last thirty years or more. It is just as easy for that same boiler to last half as long if not maintained yearly with regular servicing.

7. Environmental Issues

Environmental regulations become increasingly strict as time goes on. This is good for buyers of new homes, but it does not necessarily protect you if you are purchasing an older home. Radon, lead-based paint, mold and asbestos are all health concerns.

Be aware of the dangers of these materials and verify  whether they are present in each property. If the home is serviced by a well (as opposed to public water), it is also a good idea to get that tested too. Often times standard well tests will only do a limited screening for such things as iron, copper, manganese, etc. You will want to make sure you also test for more dangerous compounds such as arsenic, mercury and lead.

8. Poor Drainage

Water damage is a risk in areas with poor drainage. Verify that each home you consider has adequate drainage to deal with area rainfall. Because water damage can lead to expensive repair work and mold infestation, you need to ensure that drainage is sufficient on any property you purchase. This is one issue as a home seller not to mess with. There is nothing that will kill a real estate sale quicker than a water issue. Buyers do not want to even think about having a water problem with their home.

9. Electrical Safety Concerns

Older homes may not have electrical systems up to current codes. Things like ground fault breaker outlets in bathrooms and kitchens, as well as grounded outlets throughout the house are necessary for a safe living environment, especially when you consider the current electrical load people put on their homes with new appliances and electronics. In older homes look out for knob and tube wiring.

Most lenders will not provide a loan and most insurance companies will not ensure a home with knob and tube wiring. Eliminating a huge chunk of the buyer pool is not going to help you get top dollar for your home. This is an issue you would want to address before listing your home for sale.

10. Roof Water Control

Gutters may seem like a minor part of a home, but they do a very important job in keeping your house free from water intrusion. Clogged or poorly maintained gutters can leave your home exposed to water and the mold that comes along with it. Sellers that have plants growing in their gutters bring negative attention to their homes. It looks like you could care less about the upkeep of your property and makes buyers look more closely at other potential problems.

check2

11. Plumbing Problems

Plumbing may be hidden from site in homes, but it is a large part of what makes the modern home livable and comfortable. Older homes with older pipes can present problems, though. Make sure your potential home has plumbing that works, and no serious plumbing issues right around the corner. Things like tree root growth can quickly stop up your plumbing and may be a problem with older pipes.

12. Bad Insulation

Modern insulation is excellent at keeping the temperature in your home comfortable. However, some home builders, especially in older homes, did not always insulate adequately. If you view a home in summer, you may be surprised come winter when the house will just not hold heat. Have someone who knows verify that the home has good insulation before you buy. It is common for older homes to not have nearly the same energy efficiency due to lack of insulation in walls and sometimes in the attic as well.

13. Poor Ventilation

A home that does not allow airflow is at risk of developing mold problems, a nightmare for any homeowner. Verify that the home you are looking at allows airflow throughout the house, including the attic. It may be impossible to achieve perfect airflow in every room, especially basements, but the home should allow airflow through most rooms of the house.

One of the most notable home imperfections is a bathroom vent dumping into the attic and not out through the roof. While a bathroom being vented through the roof is now code in most states, this was not the case until recently. It is very common to see homes that have venting leading into the attic, creating the perfect environment for moisture and mold growth.

14. Foreclosed Homes

Foreclosures may initially present an excellent deal, but they also present certain risks. Sometimes earlier owners will do serious damage to such homes before exiting the property. This can include anything from stripping copper piping to tearing out cabinets or other valuable fixtures.

Always look over the property before getting your hopes up, because sometimes you do get what you pay for. When real estate deals seem to good to be true they usually are! Keep in mind when you purchase a foreclosed home the lender who now owns the home generally will know very little about the previous owners’ upkeep and maintenance.

The Help of Someone Who Knows

If these 14 things seem like a lot to keep track of, it is because they are. This is why the help of an experienced professional real estate agent can prove so valuable. They look for such things as a matter of course. However, if you choose to go it alone, make sure to download a home viewing checklist to make sure you cover all of your bases before making an offer.

These are all common items that can certainly be discovered at a home inspection by a qualified home inspector. As a buyer, you should be making mental notes of these items before hand so you can make an offer and budget accordingly. When you are mentally prepared for these types of issues when purchasing real estate, there will be a lot less stress involved with your transaction should one or more of these problems crop up. Don’t lose your cool when you find a problem. Take it slow and do the necessary research to resolve the problem by speaking with a few reputable contractors and getting necessary estimates for repair.

Credit to Bill Gassett
Bill Gassett is a nationally recognized real estate leader who has been helping people move in and out of the Metrowest Massachusetts area for the past twenty six plus years. He has been one of the top RE/MAX REALTORS® in New England for the past decade. In 2012 he was the #1 RE/MAX agent in all of New England.

NS_Blog_Web_Banner

Please follow and like us:
error

6 things every new real estate agent should do

It’s exciting to get your real estate license! The information presented in the prelicensing class can be a bit overwhelming (and utterly useless in your marketplace), but it’s all part of the coursework. You study and stress, stress and study, then pass your state licensing exam. When you learn that you’ve passed the test, you are elated and can’t wait to get started … but you learn fairly quickly that you don’t know where to start.

So here are the six things you should do:

Real estate puzzle

1. Select a broker.

Broker selection is critical. Your broker is the one who will help you map out your path to success.

You’ll want to interview a few brokers to compare what each of them has to offer in terms of compensation, knowledge, leadership and training. It may be tempting to sign with the broker offering the highest compensation package, but the other three traits are much more important to consider. If you don’t work with a knowledgeable broker who has strong leadership skills and who offers training, then you are less likely to reach your goals because you won’t learn the skills it takes to be a successful real estate agent.

2. Do more listening.

As a new agent, you have a lot of questions about what to do and how things are done. You have thought about how you want to work and where your business will come from, and all you want to do is get started. Because you don’t know what you don’t know, talk to your broker to see whether they have a 30-day program you can follow to get your business up and running. Although you may be anxious to share your ideas, try to listen more than you talk. Your ideas could be interesting but ultimately unrealistic. Listening to advice from your broker and other successful agents in your office about how to start your business is invaluable.

3. Get the word out.

Now that you’ve become an agent, you’ll want to get the word out. One of the best ways to start is by sending those on your list a handwritten message. It can be a simple three-sentence note simply letting your friends know that you have become a real estate agent and would appreciate it if they would keep you in mind for future business. Before you say that a handwritten note wouldn’t work for your people, give it a try. Because handwritten notes are so rare, recipients absolutely love them. It’s a welcome change from the usual bills they receive in the mail!

4. Learn the neighborhoods.

Many experienced agents have a niche or are known as experts in a certain neighborhood. As a new agent, you don’t have the luxury of having a niche; you just need some business. To better serve your clients, you will need to know the majority of the neighborhoods in your market. What are the house styles, price points and amenities? Since you don’t have many (or in some cases any) clients, use this time to learn the ins and outs of as many neighborhoods and possible. This information will serve you well as you assist visitors at an open house or when answering calls when sitting on floor or desk duty.

5. Be patient.

The average real estate agent sells one or two properties their first year in the business. About 75 percent of new agents fail in that first year. It is important to understand that you are building a business, and it takes time. Every successful agent you see had to start in the same place you are starting.

Continue to work on your business every day. Be patient. As you increase your knowledge, your confidence will increase. And as you grow more confident you will want to talk to more people. That is how your business will grow.

6. Find opportunities to learn.

Understand that not everything will go your way. Your friends and family will not always work with you. You will not get a great lead every time you sit on floor or desk duty. You may have zero visitors at the open house you are working. But all of these issues that appear to be setbacks enable you to improve how you run your business. Just because you don’t get a hot lead doesn’t mean that you can’t hone your telephone skills with those who do call in. When working an open house, you had to research the neighborhood and the other listings in that neighborhood, so you learned something new. Everything you do is an opportunity to learn.

Credit to Candy Miles-Crocker

Candy Miles-Crocker, “The Real-Life Realtor”, mentors and coaches new and experienced real estate agents to transform their business by mastering her proven systems for success. She is a firm believer in managing expectations and her goal is to elevate the perception of real estate agents among the general public through education. Candy’s unique training methods have shown agents what it takes to be successful!

NS_Blog_Web_Banner

Save

Please follow and like us:
error

9 Tax Deductions Every Real Estate Agent Should Know

Tax business

Closing a real estate sale requires a big investment of your time and money. Whether expenses are business, personal, or something in between can be unclear — leading to missed deductions and overpayment of taxes.

This is key knowledge regardless of who’s doing your taxes. Understanding which expenses are allowed will help you deduct with confidence and avoid overpaying on your quarterly and year-end taxes, no matter where you are in your career.

1. Vehicle Mileage or Expense

You spend your days driving between properties and appointments. How do you determine whether to go with the standard mileage deduction or track all your auto-related expenses? If you drive 10,000 miles or more per year for your real estate business, you will most likely get the greatest tax benefit by taking the standard mileage deduction.

The IRS requires you to keep a detailed log in order to claim this deduction, which includes date, time, mileage and purpose of the trip. Mileage tracking apps can streamline this process, automatically capturing trip date, length, and time of day for easy categorization.

If you are a lower mileage driver, or have especially high car payments, the actual cost method may yield a higher deduction. The two methods can be compared in more detail in this article.

2. Marketing and Advertising

To be a success and scale their business in a predictable way, most real estate professionals invest heavily in marketing and advertising. Remember that you can deduct not only the direct cost of promotions such as business cards, flyers, signs, ads, and promos but also the production costs, such as writing and design fees, whether the materials are produced by an agency or part-time hire.

Digital and online advertising costs are quickly becoming the greatest area of spending. This includes website design and hosting fees, search engine marketing, pay per click advertising, video production, and any other IT-related costs. Be sure to track all these business expenses.

3. Home Office Deduction

Do you have a dedicated area of your home for work? If so, you’re eligible for a home office deduction even if you also have office space at your broker’s office — unless you’re deducting desk fees already (see more below). Like the vehicle deduction, the home office deduction offers an option: the regular method or a simplified method. Most self-employed people find that the simplified method maximizes their deduction. However, if you have a particularly large home office, or live in a very high-cost area, the regular method — in which you track actual expenses — may yield the highest deduction.

4. Desk Fees

Whether you are hanging your license under a national franchise or with an independent broker, your desk fees are deductible. Note, however, that if you are taking a deduction for brokerage desk fees, you will not be able to claim the home office deduction.

5. Office Supplies and Equipment

Regardless of which office deduction you take, you can claim other office-related expenses, such as stationery, photocopies, and any other consumables needed to run your business. Other large purchases that can be expensed in full – or depreciated over a number of years –include furniture, fax machines, copiers, computers, or you telephone and associated bill.

If you have a dedicated landline telephone for business, you can fully deduct this expense. Increasingly, agents are using a cell phone for both business and personal use. If you do, you are eligible to deduct only the business percentage of that expense.

6. Meals and Entertainment

There are two situations in which you can deduct meals as a business expense: when you are travelling on business and when you are dining with clients or with other professionals for the purpose of conducting business or generating referral business. In either case, you can deduct 50 percent of your total expense, which includes tax and tip for the meal. In the case of business entertainment, you are allowed to take the meal deduction only if business was discussed during the meal, or immediately before or after.

In the case of events that are provided to the general public, such as a well-advertised open house, you are able to deduct 100 percent of the cost of refreshments and food.

Insurance banking

7. Fees, Licenses, Memberships and Insurance

Annual fees are a common costs of doing business and are deductible. In real estate, that means your state license renewal, professional memberships, and MLS dues. An important caveat with regard to professional memberships: The portion of your membership dues attributable to lobbying and political advocacy is not deductible.  General business insurance and Errors and Omissions (E&O) insurance are both fully deductible business expenses. Additionally, you can deduct real estate taxes necessary for your business, but not self-employment taxes.

8. Professional Development and Travel

Given rapid industry change, continuing education is a great way to stay competitive. It’s also a requirement in most states. Many real estate professionals pursue professional development through classes, trade shows, conferences, or coaching. If you need to travel to attend an event or meet with a coach you may be able to deduct those transportation and/or accommodation costs.

9. Software and Business Tools

Any software needed to run your business is fully deductible – including lead generation subscription services such as customer-relationship management (CRM) software. Products such as QuickBooks Self-Employed not only help you automatically track your expenses and mileage, but may be fully deducted as well.


Credit to QuickBooks Self-Employed

QuickBooks Self-Employed helps real estate professionals like you keep more of what you earn. Categorize business expenses with a single swipe and let our mobile app track your mileage while you drive. When it’s time to file your taxes, QuickBooks Self-Employed integrates seamlessly with TurboTax and your accountant. With your business income and expenses in one place, you’ll always know where your business stands.

NS_Blog_Web_Banner

Please follow and like us:
error

10 Tips To Get Your Property Ready For Summer

It’s time to get your apartment complexes and rental properties ready for summer.

Close-up shot of female hands holding small house model on the background of defocused green nature. Real estate, mortgage, eco or country house concept

The warm weather means your residents want to get outside and enjoy the community features you offer.  Any pool areas, bbq pits, and picnic areas should be ready and inviting for summertime use and the social atmosphere that makes your property stand out.

Make sure you and rentals are ready for summer with these tips:

Little cute baby girl in blue water of the swimming pool, summer time for fun

  1. Pool Safety – Get the pool cleaned and in prime condition for summertime splashes. If you do not have a lifeguard on duty, check to make sure your posted safety signs are visible and aren’t faded by winter weather or the sun.  Check that locks and gates are in good condition to further protect young residents in your community.
  2. Fill the Propane – Nothing can kill a summer BBQ faster than a grill that runs out of fuel in-between burger flips. If you want your residents to use the community space you provide, make sure the propane tank is full and keep an extra on hand, in case your residents need to make a quick switch.
  3. Pull out the summer maintenance checklist– Each season calls for different routine maintenance. Your team should be prepared to add summer chores to their to do list like: servicing the pool, cleaning grills, organizing outdoor community areas, adjusting the irrigation system, and getting ready for A/C maintenance calls.
  4. Set Your Water – When the temperatures start to rise, servicing the irrigation system can result in big savings on water usage, prevent landscape damage, and reduce standing water.  You should also program your sprinkles to optimal summer use settings, to keep your landscape looking fresh and reduce over watering.
  5. Fire Wise – Make sure your property is prepped for high heat and that fire dangers are removed. Outside bushes and trees should be trimmed backed and dead plants removed. Additionally, make sure any grills owned by the property or your tenants are properly ventilated and positioned away from buildings. Make sure to double check your local laws about fire extinguisher requirements for landlords.
  6. Service the Air Conditioners – Enlist the help of a professional to service the A/C unit at least once a year. They will be able to check the unit, clean coils, adjust dampers, and look for any other potential problems. It is also important to remove trees, debris, or trash that can obstruct proper operation. These measures can prolong the life of a heating and air system.
  7. Check chairs, umbrellas and tables – Multifamily renters are about to spend more time outdoors, that means any chairs, tables and umbrellas are going to get a lot of use. Your property will be more inviting and safer if those community fixtures work properly.
  8. Send a Friendly Rule Reminder to Residents – The warm weather and late sunset times brings people outside late into the night. Remind your residents of the complex’s quiet hours and any rules about using the pool, grills, and community amenities. Make sure to include information about your guest policies and parking.
  9. Check Your State and Local Requirements – Did you know that in Washington, D.C. the housing code requires landlords to put screens on windows and doors from March 15 through November 15 to protect tenants from insects and pests? Make sure you are following state and local laws for seasonal requirements like this for landlord compliance.
  10. Don’t Forget About Renewals – With all the fun your residents are having this summer, take advantage of asking for renewals while spirits are high. Try hosting a community event, like a BBQ or pool party, and offer renewal incentives.  The more your remind your tenants about how much fun it is to live in your property, the more likely they will stay.

When it comes to summer at your rental properties, remember to prioritize safety by encouraging your tenants to socialize and enjoy themselves responsibly this season.


Credit to Kaycee

Kaycee manages marketing and media relations for Rentec Direct, bringing a unique perspective to the world of property management and proudly shares industry news, products, and trends within the community

NS_Blog_Web_Banner

Save

Please follow and like us:
error

Spring and Summer Energy-Saving Tips

by energy.gov

green1

Here you’ll find strategies to help you save energy during the spring and summer when the weather is warm and you are trying to keep your home cool. Some of the tips below are free and can be used on a daily basis to increase your savings; others are simple and inexpensive actions you can take to ensure maximum savings through the spring and summer. For more ways to stay cool while saving energy, check out our Energy Saver 101 infographic, covering everything you need to know about home cooling.

If you haven’t already, conduct an energy audit to find out where you can save the most.

Also check out tips to save energy during the fall and winter.

Use Your Windows to Gain Cool Air and Keep Out Heat

  • If you live in a climate where it cools off at night, turn off your cooling system and open your windows while sleeping. When you wake in the morning, shut the windows and blinds to capture the cool air.
    • Learn more about natural ventilation.
  • Install window coverings to prevent heat gain through your windows.
    • Find out about window treatments and coverings that can improve energy efficiency.

Operate Your Thermostat Efficiently

  • Set your thermostat as high as comfortably possible in the summer. The smaller the difference between the indoor and outdoor temperatures, the lower your overall cooling bill will be.
  • Keep your house warmer than normal when you are away, and lower the thermostat setting to 78°F (26°C) only when you are at home and need cooling. A programmable thermostat can make it easy to set back your temperature.
    • Find out how to operate your thermostat for maximum energy savings.
    • Also see the ENERGY STAR® June 5, 2008, podcast for video instructions on operating your programmable thermostat
    • Or see ENERGY STAR’s guidelines for programmable thermostats.
  • Avoid setting your thermostat at a colder setting than normal when you turn on your air conditioner. It will not cool your home any faster and could result in excessive cooling and unnecessary expense.

Use Fans and Ventilation Strategies to Cool Your Home

  • If you use air conditioning, a ceiling fan will allow you to raise the thermostat setting about 4°F with no reduction in comfort.
    • Learn more about using a ceiling fan to increase cooling efficiency.
    • Find ENERGY STAR ceiling fans.
  • Turn off ceiling fans when you leave the room. Remember that fans cool people, not rooms, by creating a wind chill effect.
  • When you shower or take a bath, use the bathroom fan to remove the heat and humidity from your home. Your laundry room might also benefit from spot ventilation. Make sure bathroom and kitchen fans are vented to the outside (not just to the attic).
    • Find ENERGY STAR ventilating fans.

Keep Your Cooling System Running Efficiently

  • Schedule regular maintenance for your cooling equipment.
    • Learn about operating and maintaining your air conditioner, evaporative cooler, or heat pump.
  • Avoid placing lamps or TV sets near your room air-conditioning thermostat. The thermostat senses heat from these appliances, which can cause the air conditioner to run longer than necessary.
    • Learn additional tips for operating a room air conditioner efficiently.
  • Vacuum registers regularly to remove any dust buildup. Ensure that furniture and other objects are not blocking the airflow through your registers.

green2

Don’t Heat Your Home with Appliances and Lighting

  • On hot days, avoid using the oven; cook on the stove, use a microwave oven, or grill outside.
  • Install efficient lighting that runs cooler. Only about 10% to 15% of the electricity that incandescent lights consume results in light—the rest is turned into heat.
    • Learn more about your options for efficient lighting.
    • Find out when to turn off your lights.
    • Purchase ENERGY STAR lighting products.
  • Take advantage of daylight instead of artificial lighting, but avoid direct sunlight.
    • Learn more about strategies for efficient daylighting.
  • Wash only full loads of dishes and clothes. Consider air drying both dishes and clothing.
    • Learn more about efficient dishwashing and laundry.
  • Take short showers instead of baths.
    • Learn more ways to reduce your hot water use.
  • Minimize activities that generate a lot of heat, such as running a computer, burning open flames, running a dishwasher, and using hot devices such as curling irons or hair dryers. Even stereos and televisions will add some heat to your home.
    • Learn more about avoiding heat buildup in your home.

Keep Hot Air from Leaking Into Your Home

  • Seal cracks and openings to prevent warm air from leaking into your home.
    • Learn more about air sealing new and existing homes.
  • Add caulk or weatherstripping to seal air leaks around leaky doors and windows.
    • Find how to select and apply the appropriate caulk.
    • Learn how to select and apply weatherstripping.
    • Find out other ways to improve the energy efficiency of your windows.

Lower Your Water Heating Costs

Water heating accounts for about 18% of the energy consumed in your home.

  • Turn down the temperature of your water heater to the warm setting (120°F). You’ll not only save energy, you’ll avoid scalding your hands.

NS_Blog_Web_Banner

Please follow and like us:
error

10 Ways to Keep Your Home Cool This Summer

beach scene in st. peter-ording / germany

If you don’t have an A/C unit, want to keep your electricity costs down, or simply don’t trust your property’s outdated cooling system to work efficiently, we’ve put together the top simple and affordable tips for keeping your house cool this summer.

  1. Switch your ceiling fans. Change your ceiling fan setting so the blades turn counter-clockwise in the summer. This seasonal fan adjustment will force air down into the room creating a windchill effect, that will make the room feel cooler (even if it isn’t). Check out this video for how to easily change your ceiling fan’s direction of rotation.
  2. Change Your Bulbs. Traditional incandescent bulbs turn about 90 percent of the electricity they use into heat, and only 5 to 10 percent into light. By switching to fluorescent, compact fluorescents or LED lightbulbs your lighting systems won’t be adding unwanted heat inside your home. Plus these types of bulbs last longer and use less energy so you’ll be saving money in the long run beyond your cooling bill. Not sure you want to commit to higher priced LED bulbs, Lloyd Alter provides a great explanation of the different types of LEDs and his experience converting his home to 100% LED lighting for treehugger.com.Electrical bulb, white light isolated
  3. Turn off the lights. Even better than changing your lightbulbs, try to use as little artificial lighting as possible. The longer days means you can rely on natural sunlight to see throughout the day. So flip the switch when you leave a room and let daylight be your guide during your summer activities.
  4. Unplug electronics. Although seemingly minimal, your electronics still use electricity when they are plugged in and not turned on. Try unplugging your tv, chargers and computers when they aren’t in use, to avoid the passive heat generation.
  5. Don’t touch Your stove – It’s time to get creative with your summertime meal prep. Using your stove or oven in the summer can significantly increase the inside temperature of your house. After all the work you’ve spent trying to keep hot air from coming inside, why would you reverse it by making heat source from within.There is a reasons grilled foods are associated with summer, so it’s time to fire up the bbq. For stovetop cooking, try using an electric skillet setup outside for easy cooking options. You can essentially make anything that you would saute or pan fry in an electric skillet without ever needing to touch your stove. If you don’t have an outdoor patio to keep the heat outdoors, instead of cooking on skillet, you can try using your slow cooker at night, so the appliance is on during the coolest part of the day, resulting in minimal house heating.
  6. Install Blackout window curtains. Keeping your blinds or curtains closed during the summer essentially prevents your home from becoming a miniature greenhouse, especially if you have a south- or west- facing windows. Adding blackout curtains to your windows can provide additional protection for keeping the heat out during the summer. The Department of Energy claims that, “Studies demonstrate that medium-colored draperies with white-plastic backings can reduce heat gains by 33%. Check out more elaborate energy-efficient window treatments for keeping out summertime heat at Energy.gov.
  7. Consider Outdoor Window Treatments. Hang tightly woven screens or bamboo shades outside the window during the summer to stop 60 to 80 percent of the sun’s heat from getting to the windows.  If you rent your property, make sure to check with your landlord or HOA about allowable outdoor window coverings.
  8. Open Up the Windows (at night). You can help get rid of unwanted heat through ventilation if the temperature is lower outside than it is inside. To facilitate ventilation, window fans should be located on the downwind side of the house facing out. A window should be open in each room. Interior doors must remain open to allow air flow.
  9. Try this fan hack. Fill a mixing bowl with ice (or something equally cold, like an ice pack or ice block) and position it at an angle in front of a large fan, so that the air whips off the ice at an extra-chilled, extra-misty temperature. Trust us: it’s magic.Put a block of ice (in a pan big enough to catch the melted volume of water) in front of the fan. Makeshift air conditioning!
  10. Tint your windows. If you don’t want to commit to new window treatments or hate the idea of keeping the outdoors out of view all summer long, try a temporary tinting solutions for your windows. Gila makes window film that clings to your window as a temporary heat reducing fix.

Credit to  Kaycee

Kaycee manages marketing and media relations for Rentec Direct, bringing a unique perspective to the world of property management and proudly shares industry news, products, and trends within the community. More from this author.


NS_Blog_Web_Banner

Please follow and like us:
error

Tech Secrets from Rising Real Estate Stars

business people group on meeting

Online reviews aren’t just for restaurants; they are equally useful for real estate marketing. They also happen to be Kimberly Sethavanish’s secret weapon.

Sethavanish, a salesperson at Century 21 Alliance in Santa Rosa, Calif., has gained three listings from clients finding her positive reviews on Yelp. After each transaction, Sethavanish asks her clients to share their experience with her services and, for the most part, they are happy to help. And best of all, these highly persuasive online reviews are free.

“If you’re not putting yourself out there, you’re not able to be found. That’s worse than anything else,” says Sethavanish, a member of REALTOR® Magazine’s 2016 class of 30 Under 30.

For this year’s 30 young entrepreneurs, technology and online tools are a way of life in their business, keeping them connected to clients and organized at the office and helping to smooth out any bumps in the road to a successful transaction.

We asked a few of the 30 Under 30 honorees to share the tech tool that keeps them on track. Here’s what we found:

They’re Paperless

In addition to online reviews, Sethavanish is also a fan of DocuSign because it helps cut the response time in her hot seller’s market. “I’ve seen it make or break a sale,” she says. “With DocuSign, you can get your counteroffer in before someone else does.”

Several other 30 Under 30s also attest to the benefits of electronic signatures.

Shari Anhorn, CRS, GRI, team member and broker-owner at Brokers 12 Inc. in Minot, N.D., has been using DocuSign, a REALTOR Benefits® Program partner, since 2011, putting her among the first agents in Minot to use electronic signatures.

“This is rural North Dakota, and to be able to have a seller or buyer who is two hours away sign a document from afar is tremendous,” she says. What’s more, many of her clients are military personnel who have to purchase property sight unseen, and DocuSign has eased the process, Anhorn says.

But some 30 Under 30 members are careful not to assume every client knows how to use even the most basic technology.

The market that Diego Espinoza-Martinez, salesperson with Keller Williams Realty-Tulare in Visalia, Calif., serves is largely agricultural and heavily impoverished. While he uses DocuSign with some clients, it’s not always appropriate, he says. Instead, Espinoza-Martinez takes the time to learn his clients’ comfort level with technology and then decides on the appropriate tools for the transaction.

Another tool for going paperless is Genius Scan, available through both the App Store and Google Play. Wade Corbett, CRS, GRI, salesperson with Keller Williams Realty in Raleigh, N.C., is an avid user. “I scan a business card and import it into my database. That way, I don’t have to carry around a bunch of cards,” he says.

Genius Scan can be used to scan forms, receipts, or a multitude of other real estate documents from your smartphone. Save the images as PDFs and email them on the go. You can also export the files to your cloud service of choice, such as Dropbox or Google Drive.

Alexander Parker, also a 2016 30 Under 30 honoree, creates property folders in Dropbox for his clients, where they can share pictures, maps, and other relevant documents. Parker, salesperson with Lord & Stanley Realty in Tallahassee, Fla., is also rarely without his iPad so that he can access files anywhere and look them over with clients in the field.

In San Diego, Sarah Davis, SRES, broker owner of Davis Estates, takes her Surface Pro tablet to every client meeting. “I can take it to a showing and the buyers can sign a purchase order and send it to the listing agent while we’re still in the house,” she says. In California, agents are required to give a copy of the contract to the signer at the time it is signed, so she emails a copy to her clients directly from her tablet.

For software, she uses Microsoft OneDrive for Business, a secure cloud service, for all her transaction files. “It’s safer than email, and if my computer dies, everything is still in the cloud,” Davis says.

ssm

They Work Hard at Staying in Touch

Connie Chung, salesperson with Vanguard Properties in San Francisco, considers herself old-fashioned when it comes to staying in contact with her clients. She prefers dinners and coffee meetings over informal emails. “I can see their facial expressions, hear the tone of their voices, and have them hear mine,” she says.

And when a client needs more attention — when they’ve expressed unhappiness with a property or have an issue that needs to be resolved — Chung says that writing an email is the last thing you should do. “I find it simplifies my life if I pick up the phone, so I can really hear where they are coming from and ask if we can meet for coffee,” she says. “A lot of times, meeting face-to-face takes away any discomfort for both parties.”

On the social media front, she engages with clients and her sphere predominantly through Instagram. “Recently, I was touring a new development. It was great to wear a hard hat and neon vest and post behind-the-scenes photos that a lot of people don’t usually get to see,” she says.

Corbett describes his database as the core of his business, so he uses Brivity, a cloud-based CRM, to stay in touch. “It helps me follow up better and makes me able to utilize my time better,” he says.

Honoree Rebekah Eaton, associate broker with RealtySouth-MB-Crestline in Birmingham, Ala., is always looking for meaningful ways to stay connected to her sphere. So she recently started using BombBomb, a service that helps users produce video greetings that can be shared via email or text. “I take a little time to record a short video saying, ‘Thinking about you.’ And then I send it on. Bam.”

They Prefer to Market in a Meaningful Way

Scott Steadman, a Windermere Real Estate agent in Draper, Utah, uses his real estate blog to tell the story of his clients. “I talk about the family who spent years gathering around the fireplace for birthdays and holidays, and how that room was the place where they felt whole,” Steadman says. “Pairing posts like that with social media always gives my followers a reason to come back to my website for more info.”

Consistency is also key, Steadman says, so he rarely lets more than a few days separate his posts, which cover everything from market trends to before-and-after renovation photos.

Brittany Barsky-Allison, team member with Wydler Brothers in Bethesda, Md., focuses on promoting her business on Facebook in a “fun, organic way.” She creates an advertising campaign for every one of her listings, and she often posts pictures with clients or of homes she’s toured on her personal and business pages. She celebrates each closing with a status update and is frequently “liking” and commenting on her friends’ statuses and photos.

“This has helped me to pick up referrals and create a sense of expertise amongst my peers,” she says. “Brokerages must continue to place more emphasis on the people in the real estate industry and recognize that people buy homes, not computers, robots, or smartphones. Technology strengthens our industry, but people are at the core, and we cannot forget that simple fact.”

Barsky-Allison uses Salesforce.com to track her pipeline and communicate with her sphere of influence. She sends out weekly and monthly emails as well as monthly market updates, and acknowledges the buy or sell anniversaries of her clients by sending a note or gift.

Customer service is a top priority for honoree Jessica Bean, salesperson with Century 21 Price Right in Lewiston, Idaho. That’s why she arms herself with data from NAR’s Realtors Property Resource® before every marketing or listing presentation.

“It’s one of the most integral pieces of my business,” says Bean, who will compare RPR’s detailed reports against her own research on comps as well as the assessed value of a property. The reports also help her make the case that presale updates can make a listing much more attractive.

Bean also notes that RPR can help her craft a competitive offer in the seller’s market that currently defines much of her area. She uses it to help buyers put themselves in sellers’ shoes, explaining how she’d use the RPR data to price the home if she were the listing agent on the property. And finally, Bean loves the fact that she can pull RPR up on her phone on the go: “I literally use it every day in my business. Man, it’s a lifesaver for me.”


Credit to Erica Christoffer

Erica Christoffer is a consulting editor for REALTOR® Magazine.


NS_Blog_Web_Banner

Please follow and like us:
error

Style a Master Bedroom as a Sleep Retreat

There’s big buzz these days about the importance of getting enough Z’s for health, happiness, and productivity. Help clients analyze if a master bedroom can incorporate all the essentials to promote a good night’s sleep.

Resized_bedroom_MJCDKIYd


Adults spend more time in their bedroom than in any other room in their house. But you wouldn’t know it from the home sales process. Buyers and sellers alike often pay more attention to kitchens, master bathrooms, closets, and yards than they do to this vital space where they will usually spend more than a third of their 24 hours each day.

“Who spends that kind of time in the kitchen?” asks sleep expert Nancy H. Rothstein, founder of The Sleep Ambassador in Chicago, a source for education, consulting services, and resources that optimize healthy sleep.

Yet more attention is being paid to the importance of getting adequate sleep, from high-profile advocates like Arianna Huffington, who recently published her book, The Sleep Revolution: Transforming Your Life, One Night at a Time (Harmony, 2016), to medical professionals. “Fewer than six hours [a night] can lead to diseases — a higher rate of diabetes, obesity, cardiovascular problems, and even shorter life spans,” says Dr. Susheel Patil, clinical director of Johns Hopkins Sleep Medicine in Baltimore.

While there’s no magic figure for the amount of sleep one should get, Patil suggests adults try for seven to eight hours on average. Dr. Michael Breus, a board-certified sleep specialist in Los Angeles known as The Sleep Doctor, uses his household as an example of the variation. “I need between 6 1/2 and 7 hours while my wife needs between 8 and 8 1/2,” he says.

Buyers and sellers alike should strive to furnish a master bedroom that contributes to high-quality sleep. Updating or remodeling the room offers another benefit, says certified color consultant Michelle Mohlere, a salesperson with Gibson International in Los Angeles. A nicely designed bedroom is likely to bring in more money at resale than one without these touches, she says.

Rustic Bedroom In Traditional Farmhouse

Sellers looking to better stage this room will also gain from the following six steps:

1. Stage the bed in a choice spot. Connecticut architect and author Duo Dickinson prefers the bed be set away from the room’s entrance to keep it out of the main circulation path. Kathryn Baker, vice president of design services with Polaris Pacific, a real estate sales and marketing firm in San Francisco, likes to place a bed in a spot so occupants can enjoy the best view — whether that’s inside (maybe toward a fireplace or favorite piece of art) or outdoor (with views of trees or water where possible). Chicago designer Michael Del Piero suggests pairing a bed with an upholstered headboard for those who like to sit up in bed and read; she dresses up the bed with decorative pillows, a duvet, and a throw to personalize it and make it more welcoming to tuck in for sleep.
2. Install the right window treatments. Minimal is the design mantra when it comes to much of the standard room décor today. But while no coverings in some rooms, such as kitchens and living rooms, allows in more light and views, some amount of treatment in a bedroom is needed to block outside light and provide privacy. Del Piero likes to use a blackout shade behind a transparent shade or drapes or a woven wood shade with blackout drapes. Baker favors motorized shades to make opening and closing a task that can be performed from the bed or set by a timer.

3. Use the right lighting. Dickinson discourages installing recessed cans since they chop up a ceiling and aren’t attractive to look at while in bed. He prefers task lighting from lamps on night tables or wall-mounted sconces. Michigan designer Francesca Owings likes hanging one decorative fixture in a ceiling’s center for an aesthetic punch. Sensitive sleepers might appreciate the new Good Night Biological LED bulbs that claim to help regulate a body’s natural circadian rhythm through the production of the hormone melatonin, which helps control sleep and wake patterns, says Breus.

4. Conceal or banish electronics. For years, scientists and health professionals have known about the danger of the blue light that comes from certain electronics equipment and adversely affects melatonin production, says Patil. But only recently have they suggested that you can enhance unwinding and falling asleep by turning off TVs, smartphones, and iPads at least an hour before bedtime. Shutting them off also helps train the brain that the bedroom is primarily a place to sleep rather than stay awake, Patil says. If the temptation is too great, home owners might consider making the master bedroom a no-electronics zone. Baker’s company furnishes model bedrooms in its residential projects without TVs and other electronics technology to demonstrate this idea. “People have responded favorably, and some put TVs in a second bedroom or home office” instead, she says.

5. Pick a soothing palette. Of course, color is a personal preference, but color experts can offer guidelines. “You can’t say one is soothing for all and will make a person feel calm,” says Jessica Boyer, a Chicago designer with Susan Fredman Design Group. Sue Wadden, director of color marketing for paint manufacturer Sherwin-Williams, says colors that aren’t extreme are more restful. “They’re neither too bold, dark, bright, or intense. Rather, soft and calming,” she says. Designer Kimba Hills of Rumba Style in Los Angeles prefers a palette of pale blues, greens, beiges, grays, and whites for the bedroom. Boyer also likes to bring in bedding in white and light creams because she finds they’re calming. “It’s the equivalent of sleeping in a cloud with nothing to distract me. What’s important isn’t what’s trendy but nurturing,” she says.

6. Add creature comforts. If the room’s size allows, consider adding a chaise, chair and ottoman, and night tables. Also, a large area rug or wall-to-wall carpeting can help deaden noise and provide warmth underfoot, says Owings. If the room is located so it opens directly to the outdoors, play this up. Mohlere says real access to bucolic scenery can contribute to a sense of tranquility even more than just viewing the outdoors can. If outdoor access isn’t possible, check to see that windows are operable for fresh air. Other amenities worth considering: a gas- or log-burning fireplace for coziness, artwork for eye candy, and good storage for tidiness. “Too much clutter is distracting,” Rothstein says.

At the end of the day — or the beginning of a new one — real estate pros can emphasize the master bedroom as one more “fabulous room where you spend time in your new home,” Rothstein says.

Credit to Barbara Ballinger

Barbara Ballinger is a freelance writer and the author of several books on real estate, architecture, and remodeling

Please follow and like us:
error